GoodSync Connect allows you to connect multiple devices to one GoodSync Account. That makes backing up any data from those devices easy.
Follow the steps below to add your Android device to a GoodSync Account and create a photo backup from that device.
Adding your Android device to GoodSync Connect
1) On your Android device, download and install GoodSync from the Google Play Store.
NOTE: For instructions on downloading, installing, and initial setup of GoodSync on Android, click this link.
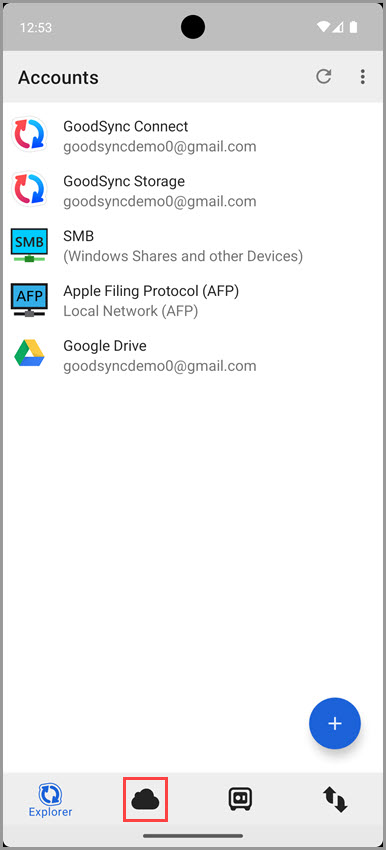
2) After downloading, installing, and performing the initial setup, open the GoodSync app. Tap the "Server" tab at the bottom of the screen.
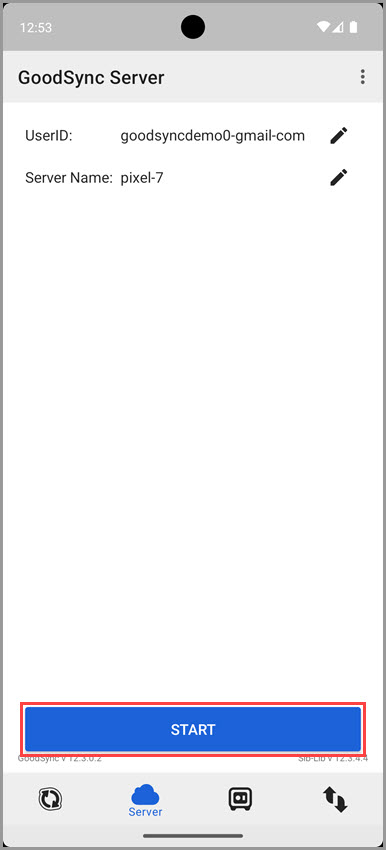
3) Tap the blue "Start" button at the bottom of the screen.
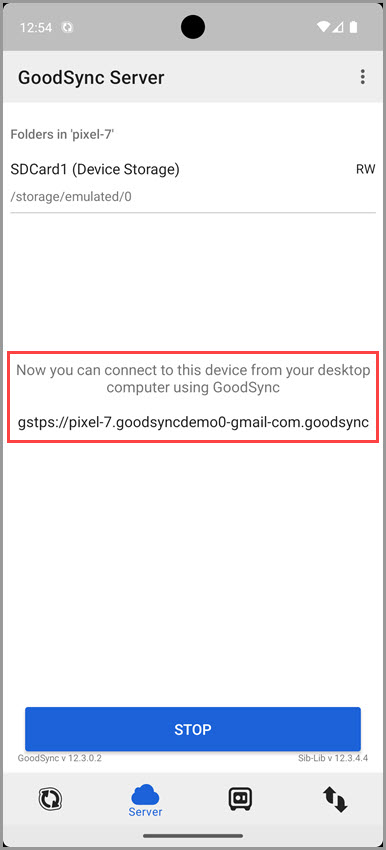
4) Once you see "Now you can connect to this device from your desktop computer using GoodSync" at the center of the app screen, the server has been successfully started. Your Android device is now reachable via GoodSync Connect.
Backing up photos from your Android device
If you have not already done so, download and install GoodSync on your computer.
After your Android device has been registered with your GoodSync Account and the |GoodSync Server is running on the Android device, open GoodSync on your computer to finish configuring the backup.
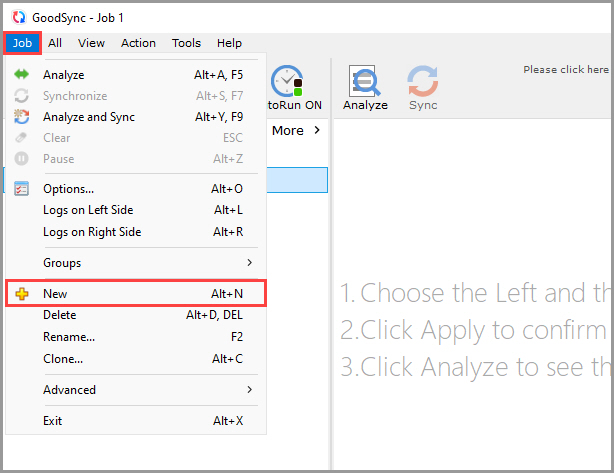
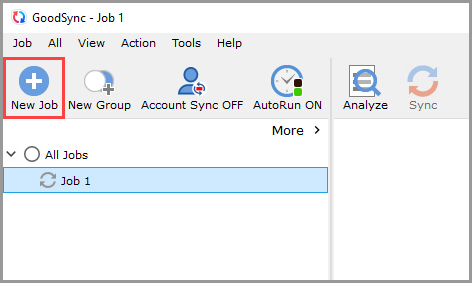
1) In GoodSync on your computer, click the "Job" menu and select "New," or click the "New Job" button in the toolbar.
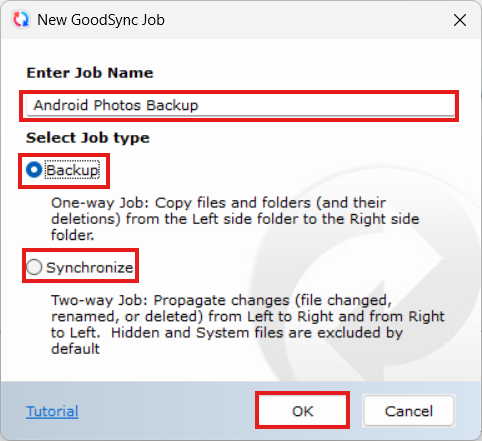
2) In the New GoodSync Job prompt, enter a name for the new job.
Example:
Android Photo Backup
Then, select the job type.
Backup - Select this option to copy photos from the Android device to the computer.
Synchronize - Select this option only if you want changes copied in both directions.
Note: For a standard photo backup, "Backup" is recommended.
Click the "OK" button when done.
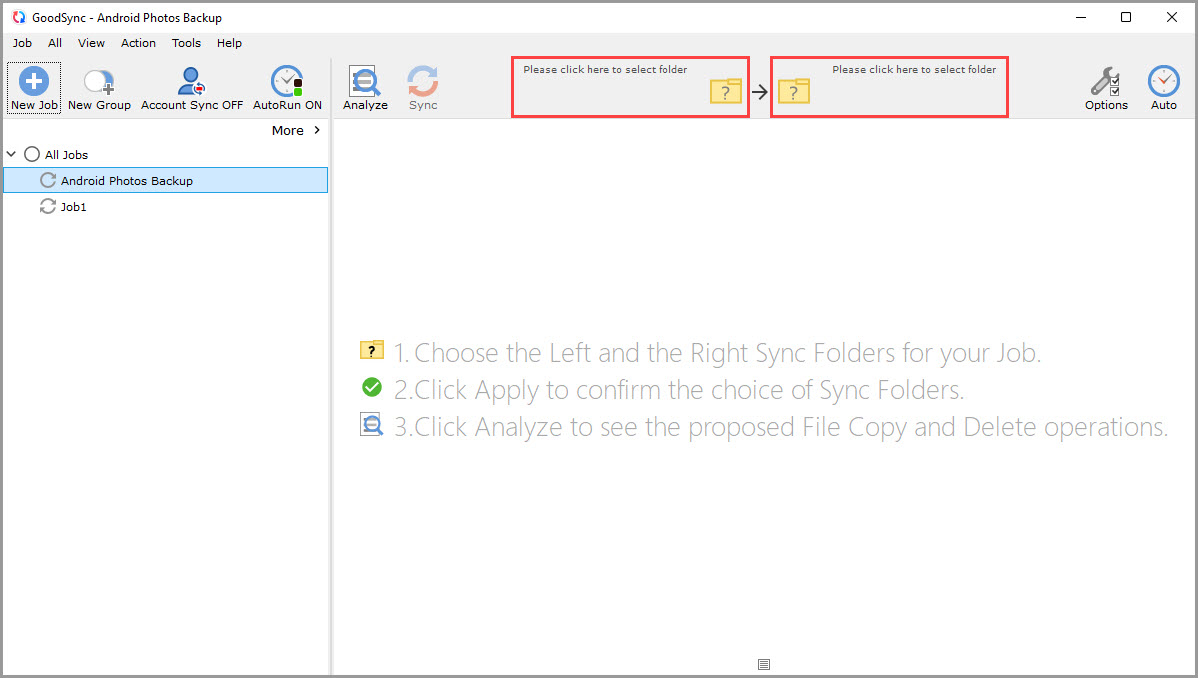
3) Click the left or right sync folder controls to view the files and folders available for selection.
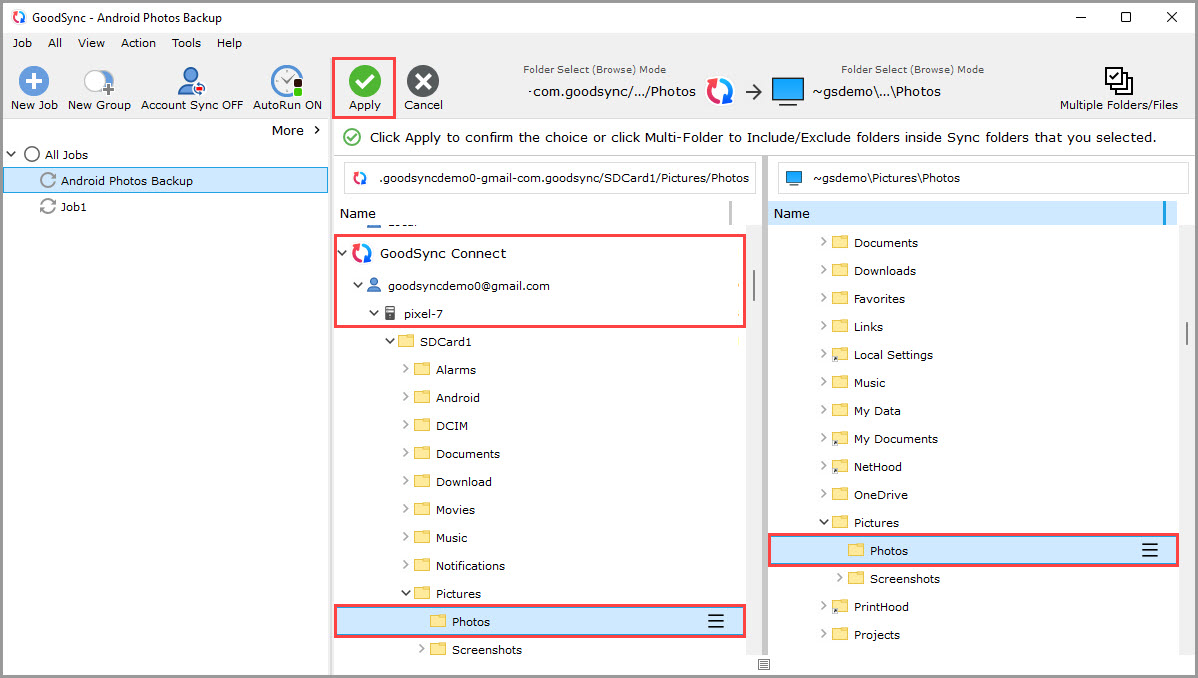
4) Click the left or right sync folder control to select the folders for the job.
This will open the file browser, where you can view the available files and folders.
For this backup, select the Android device photo folder on one side and the backup folder on your computer on the other side.
5) Click the "Options" button in the toolbar, or right-click the job and select "Options."
This will open the Job Options window, where you can configure additional settings for the Android photo backup.
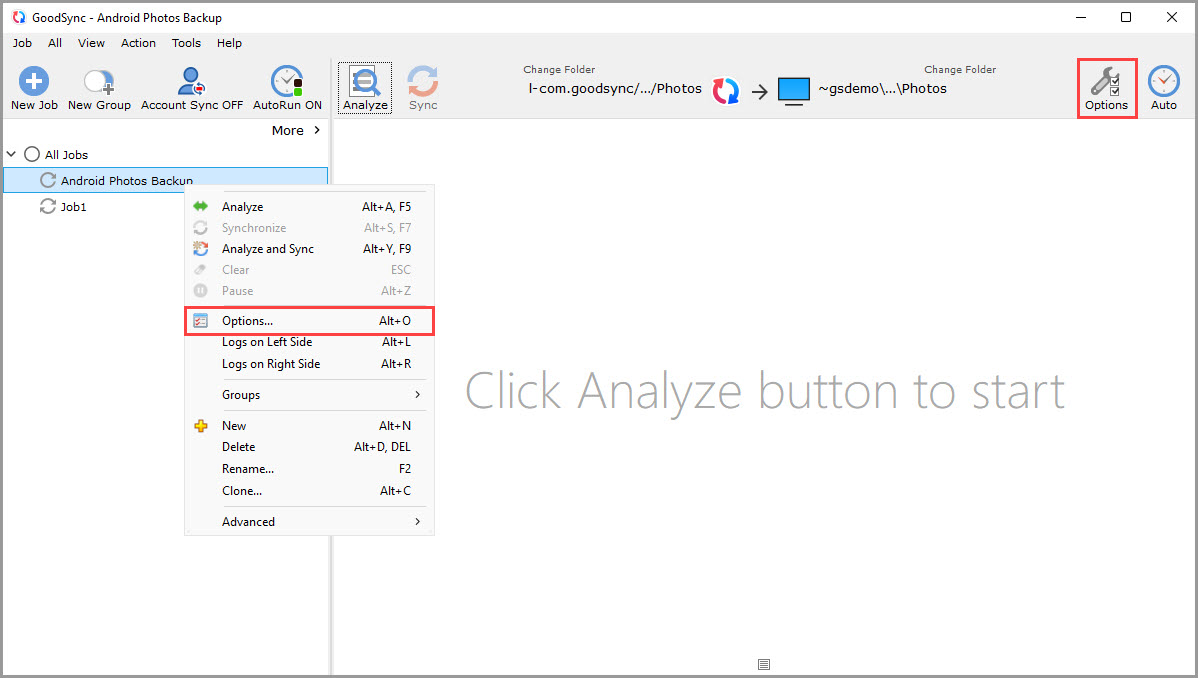
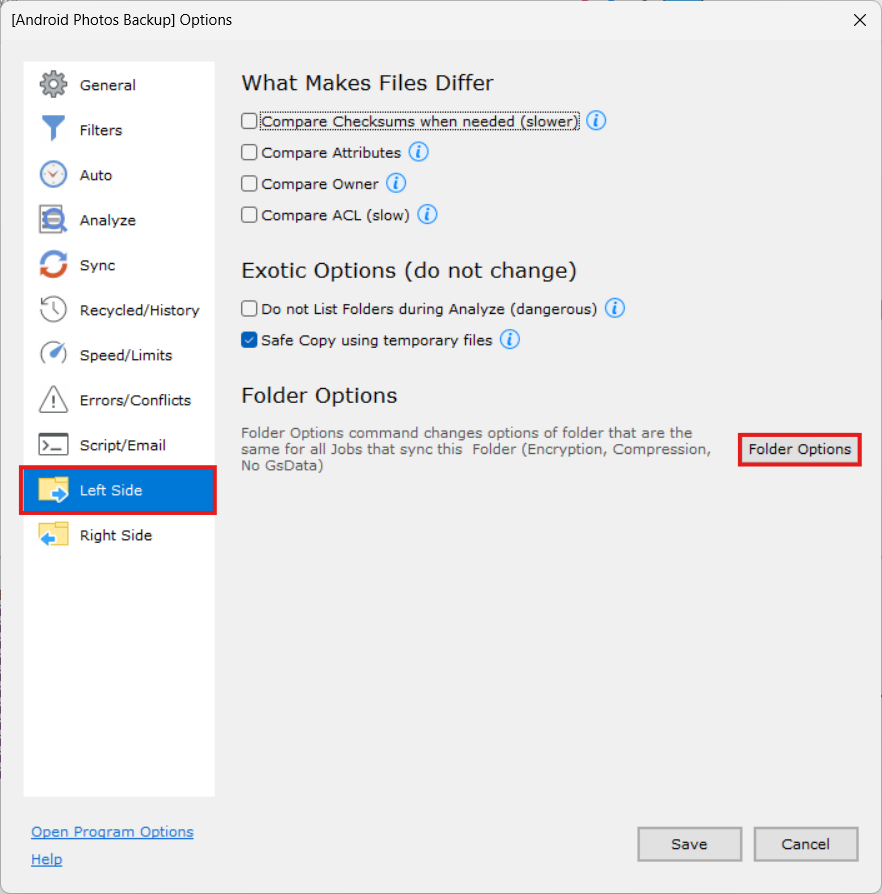
6) From the column on the left, select the side that points to the Android device.
In this example, the Android device is configured on the Left Side.
Click "Folder Options."
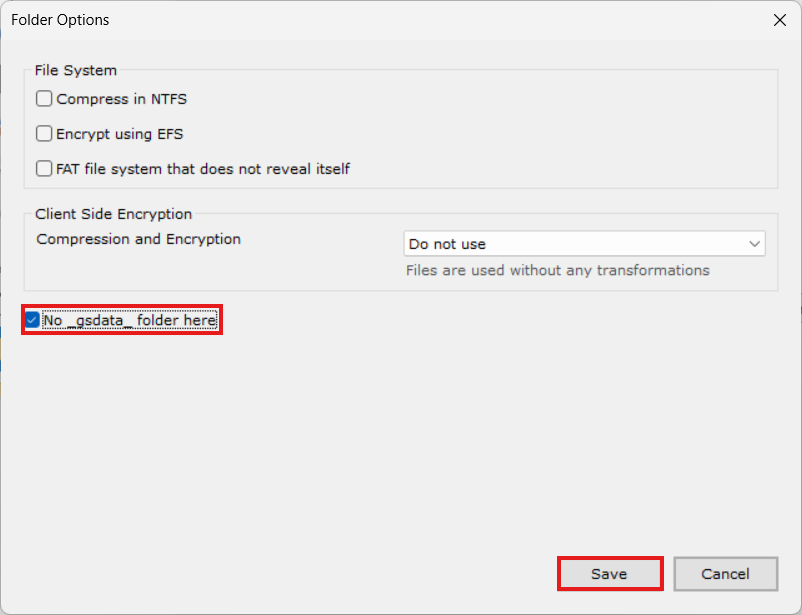
In the Folder Options window, check the box marked "No _gsdata_ folder here."
Click "Save" to close the Folder Options window.
Then, click "Save" at the bottom-right of the Job Options window to apply the changes.
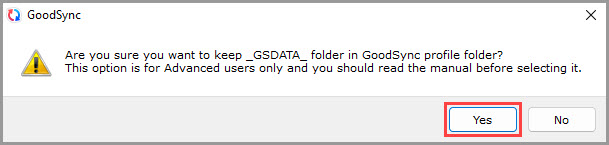
You will be prompted to confirm this change.
Click "Yes" to confirm.
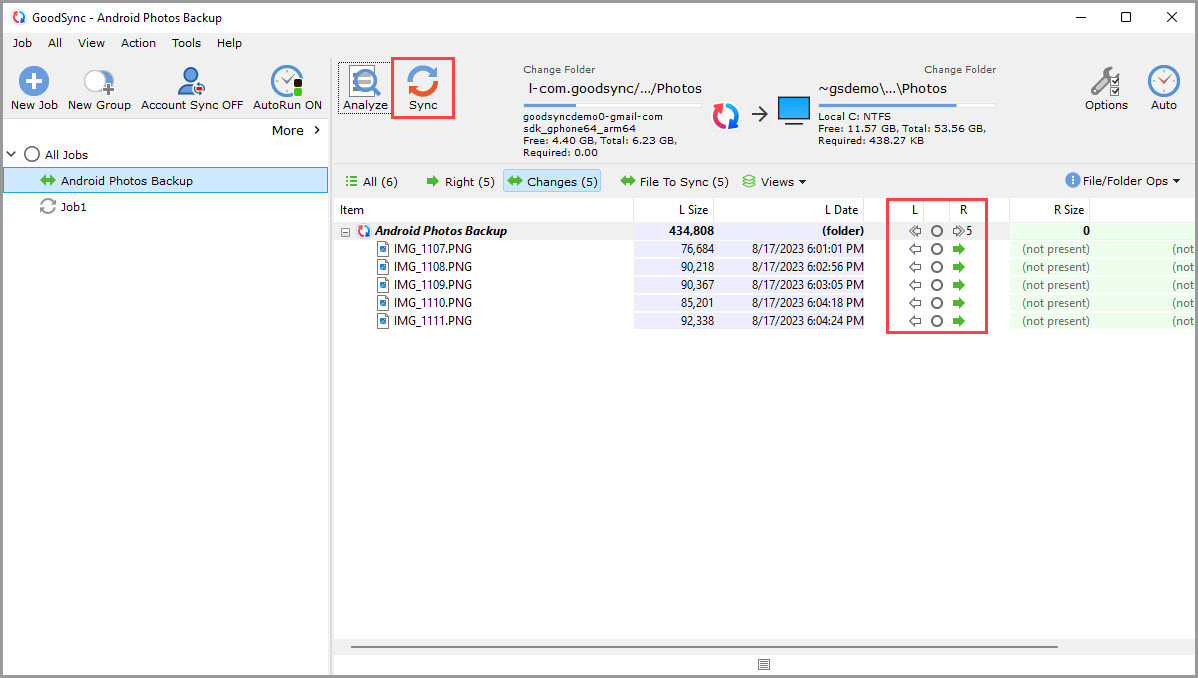
7) Click "Analyze" to scan both sides of the job and review the proposed changes.
GoodSync will show which photos are ready to be copied before the backup is started.
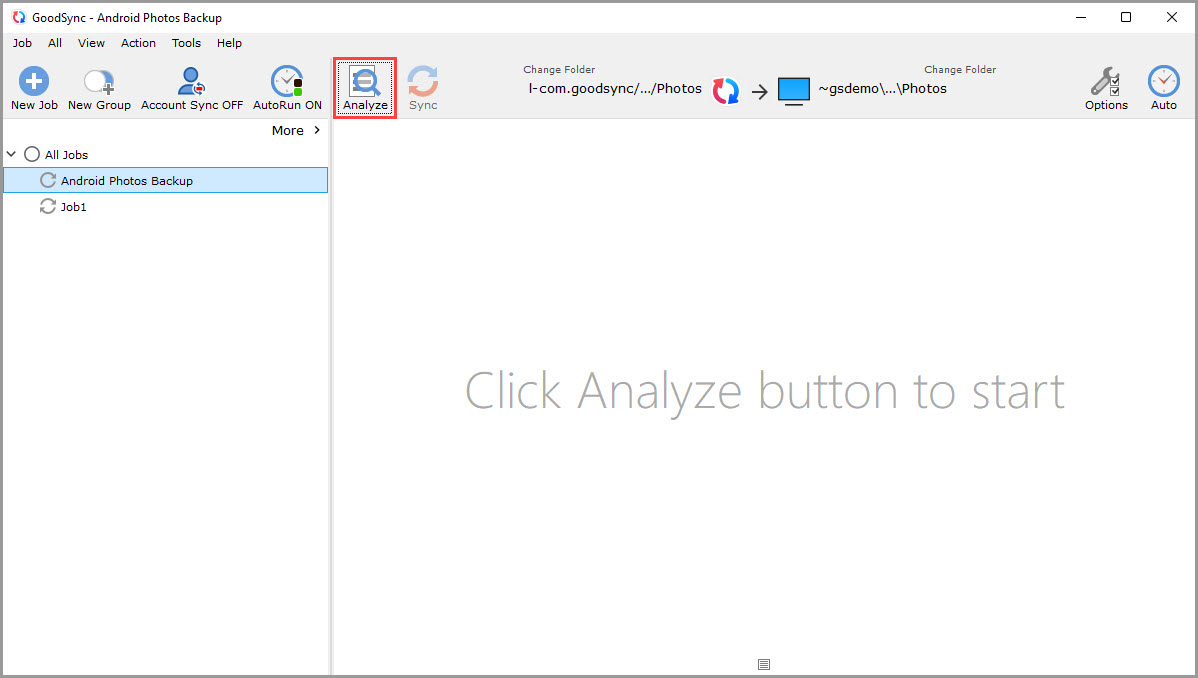
8) Click "Sync" to apply the proposed changes.
GoodSync will begin copying the selected photos from the Android device to the backup folder.
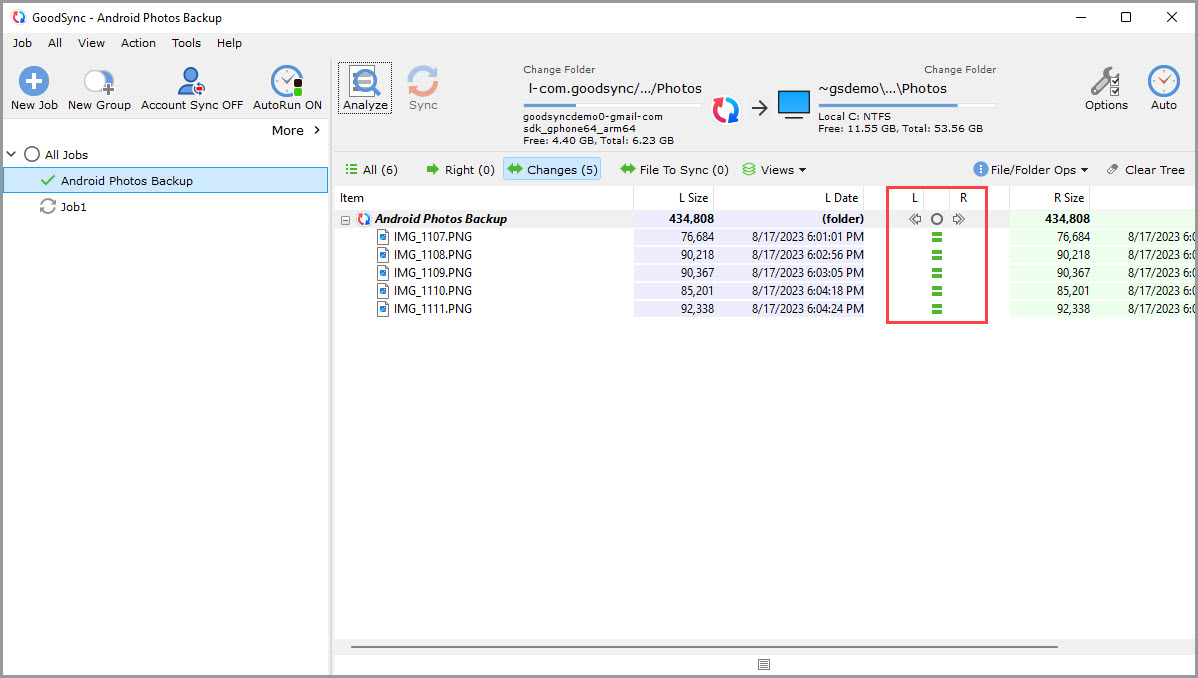
9) Once the sync is complete, GoodSync will show an equals sign between the left and right folders.
This means both sides are now in sync, and the backup job is complete.
NOTE: To configure the job with automation or other settings, click here.