A GoodSync subscription typically comes with 10 GB of GoodSync Storage (RealDisk Only Storage). You can claim this storage and use it as a source or destination for your backup or sync jobs in GoodSync.
You will not be charged for the 10 GB of GoodSync Storage (RealDisk Only Storage) as long as your paid GoodSync subscription remains active.
- How to claim GoodSync Storage (RealDisk Only Storage) through your GoodSync Account
- How to claim GoodSync Storage (RealDisk Only Storage) through the GoodSync application
How to claim GoodSync Storage (RealDisk Only Storage) through your GoodSync Account
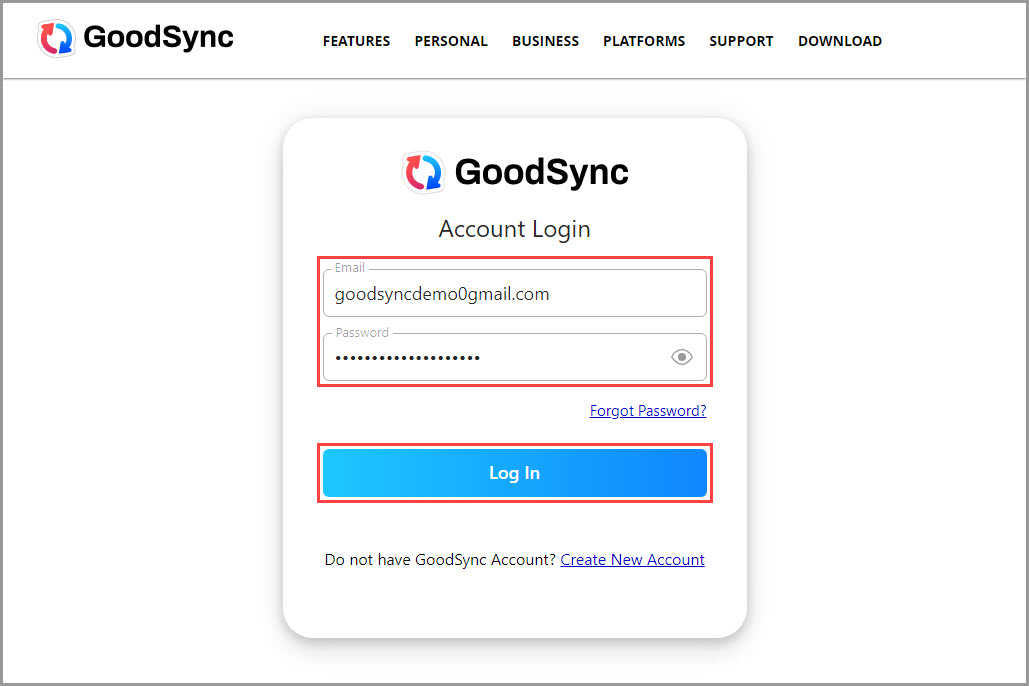
1) Go to the GoodSync Account Login page and log in to your GoodSync Account.
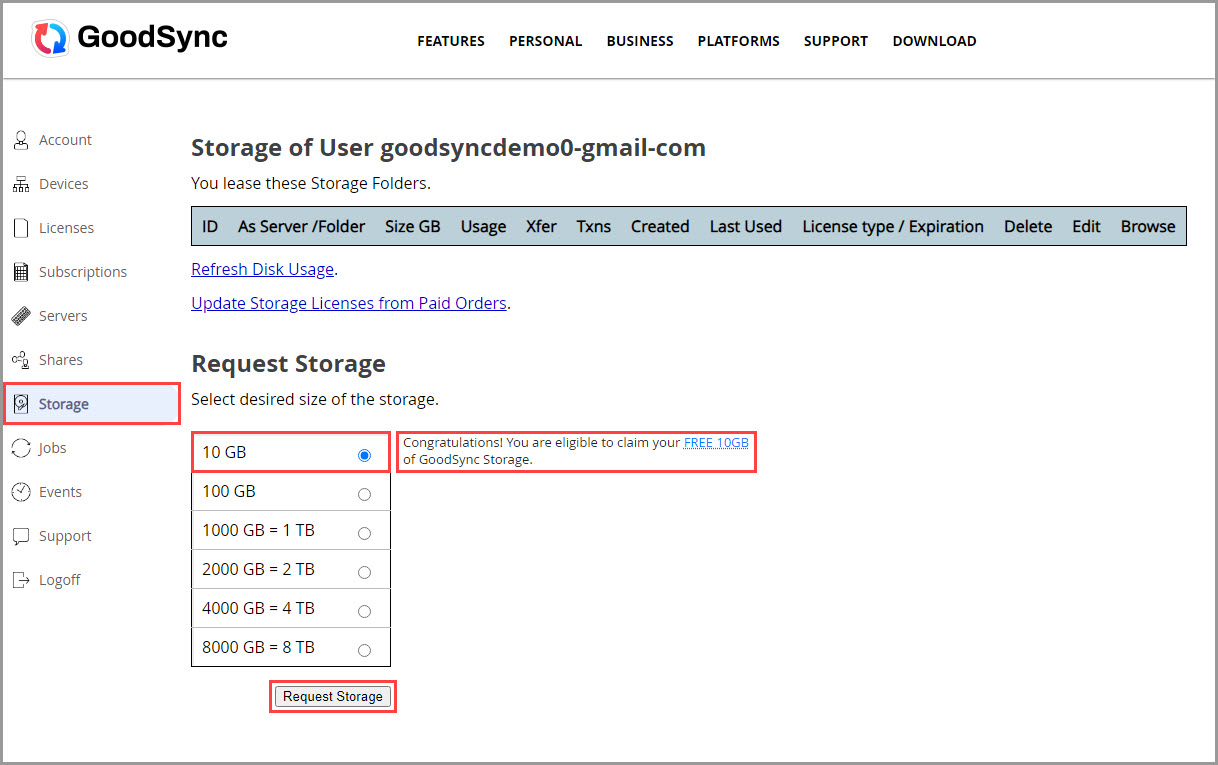
2) Once logged in to your GoodSync account, click "Storage" from the left menu.
If eligible to claim 10 GB of GoodSync Storage (RealDisk Only Storage) for free, you will see a message on the page that states "Congratulations! You are eligible to claim your FREE 10GB of GoodSync Storage (RealDisk Only Storage)."
Select 10 GB, then click the "Request Storage" button. Storage will be automatically approved and available for usage.
NOTE: If you don't see a message stating that you are eligible for 10 GB of free GoodSync Storage (RealDisk Only Storage), you can still request a 15-day free trial. Select the storage size you'd like to trial and click the "Request Storage" button to do this. After the 15-day trial period ends, you will need to purchase a storage license to keep your storage account active.
How to claim GoodSync Storage (RealDisk Only Storage) through the GoodSync application
1) Open GoodSync and navigate to "Tools" >> "Program Options" in GoodSync for Windows or to "GoodSync" >> "Preferences" in GoodSync for Mac.
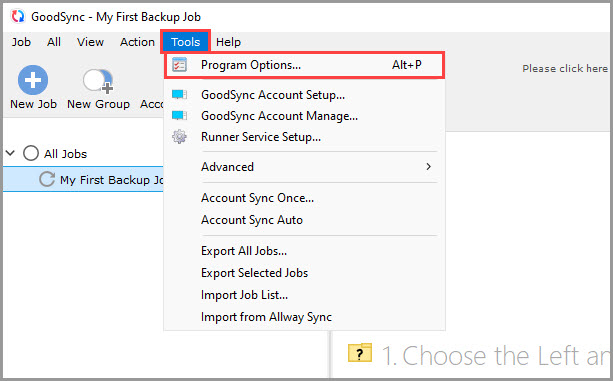
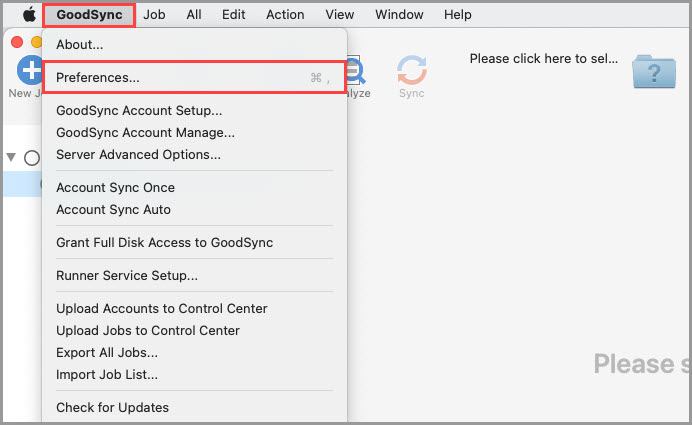
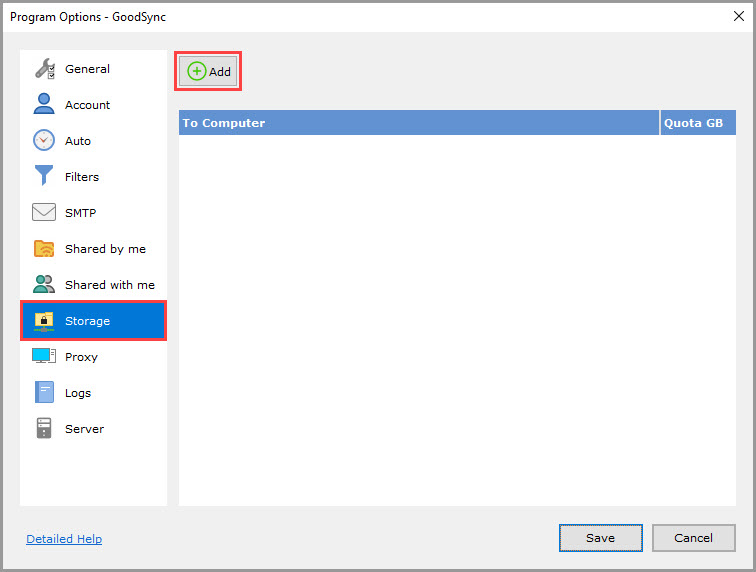
2) In the Program Options, select "Storage" from the left menu, and click the "Add" button to add storage.
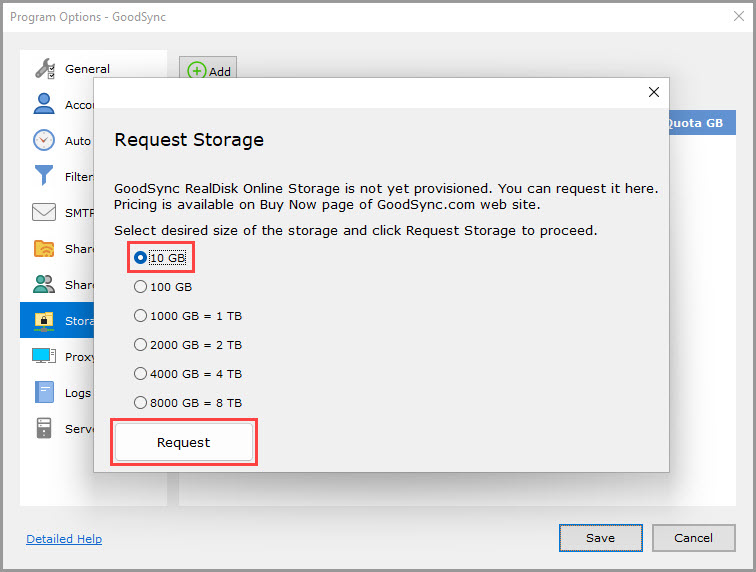
3) In the "Request Storage" dialog, select the 10 GB option and click "Request."
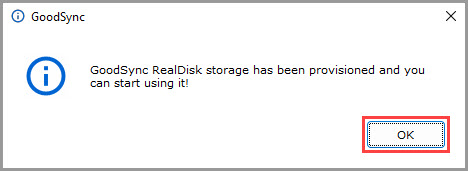
4) A confirmation message will appear, indicating that your GoodSync Storage (RealDisk Only Storage) has been successfully claimed. Click "OK" to close the message.
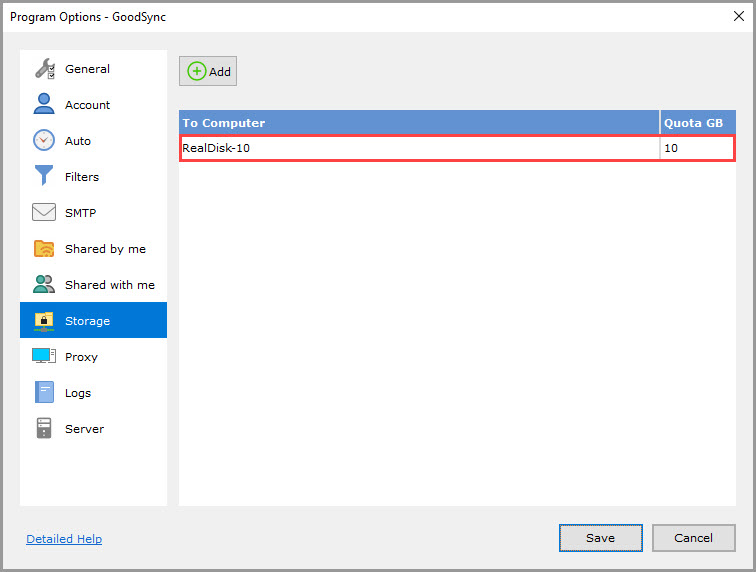
Your claimed GoodSync Storage (RealDisk Only Storage) will now be listed in the storage table and ready to be used in your GoodSync jobs.