This article applies to GoodSync for Linux. For installation instructions for Windows and Mac, refer to the corresponding section.
NOTE: You must have sudo permissions to complete installation.
Follow the steps below to install GoodSync on Linux:
1) First, determine your architecture to obtain the correct installer. This may be accomplished with the following command:
uname -aThe output of this command will indicate the appropriate architecture.

Note: For this particular example, we will use the x86_64 architecture.
2) Next, obtain the appropriate installer from the following list:
Linux for Intel 64-bit:
https://services.goodsync.com/download/goodsync-linux-x86_64-release.run
Linux for Intel 32-bit:
https://services.goodsync.com/download/goodsync-linux-i686-release.run
Linux for Raspberry Pi 32-bit:
https://services.goodsync.com/download/goodsync-linux-raspberry_pi-release.run
Linux for Raspberry Pi 64-bit:
https://services.goodsync.com/download/goodsync-linux-raspberry_pi64-release.run
Linux for PowerPC:
https://services.goodsync.com/download/goodsync-release-powerpc-release.run
Linux for ARM v5 OpenWrt:
https://services.goodsync.com/download/goodsync-linux-armv5_openwrt-release.run
Linux for ARM v5 Marvell:
https://services.goodsync.com/download/goodsync-linux-armv5_marvell-release.run
To download the installer directly from the Linux terminal, you may use the curl or wget commands.
Curl example:
curl -o goodsync-linux-x86_64-release.run https://services.goodsync.com/download/goodsync-linux-x86_64-release.runWget example:
wget https://services.goodsync.com/download/goodsync-linux-x86_64-release.run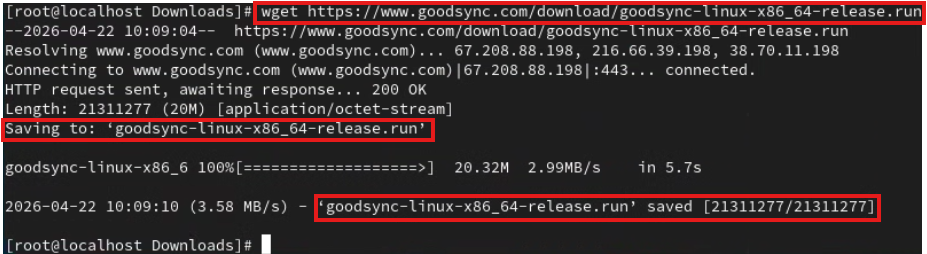
3) After downloading the installer, grant the installer execution permissions by running the command below:
chmod +x name_of_goodsync_installer.runOnce permissions have been granted, run the installer by typing "./" followed by the installer name:
./name_of_goodsync_installer.run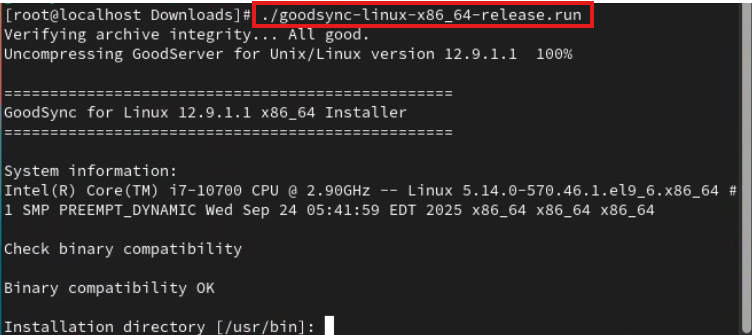
4) Press Enter to select the default values for "Installation directory" and "Server resource directory."
Enter "y" for "Do you want to run GoodSync Connect Setup?" Enter the email and password of your GoodSync Account.
NOTE: If you have not yet created a GoodSync Account, review the tutorial for Account creation.
Select "y" for "Generate new GoodSync Connect certificate for server" and "Enable GsServer Web UI on port 11000." Press Enter to select the default value for "Server log directory."
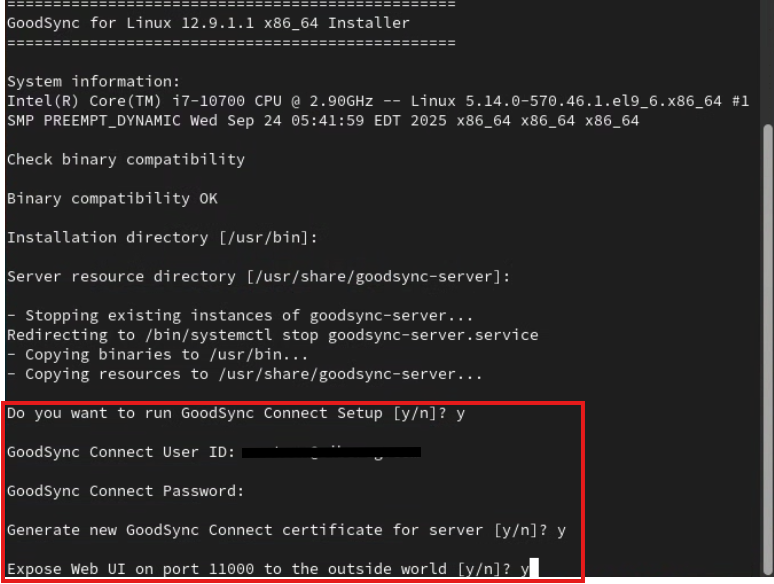
5) Enter "y" for "Do you want to configure GsServer service (run as daemon)" and press Enter to select the default value for "System User ID." Installation is now complete.
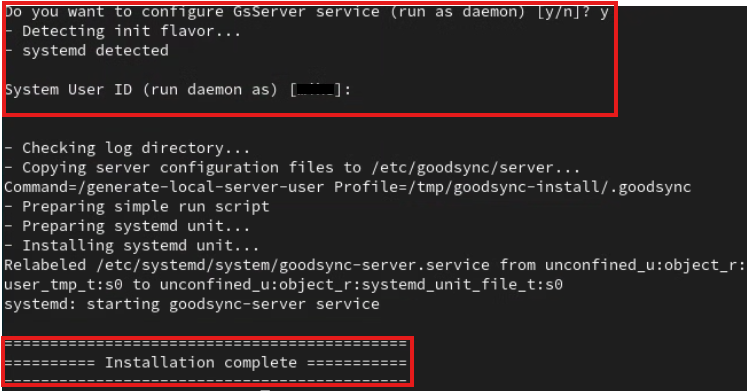
6) To confirm if the installation is configured correctly, run the following command:
netstat -plntYou should see entries for "0.0.0.0:33333" and "0.0.0.0:11000". If you see entries for "127.0.0.1:33333" and "127.0.0.1:11000", the installation was not configured successfully.
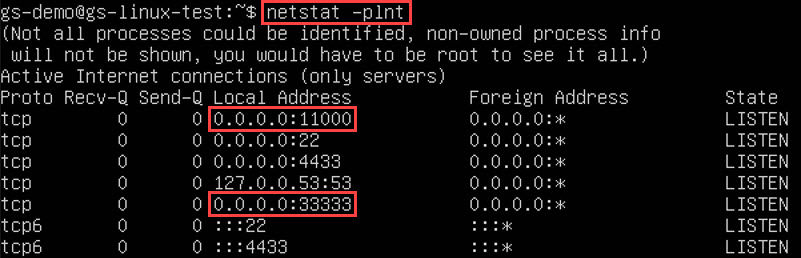
7) After installation, you can configure your GoodSync Server settings by navigating to http://ip-address:11000
Use your GoodSync Account credentials to log in.