This use case shows how to automate a GoodSync backup job that compresses and encrypts your data with 7-Zip before backing it up.
Install 7-Zip and Add It to PATH
- Install 7-Zip. It is free and can be downloaded from the 7-Zip download page.
- Add the 7-Zip folder to your Path environment variable. In Windows Search, type environment variable and click Edit environment variables for your account.
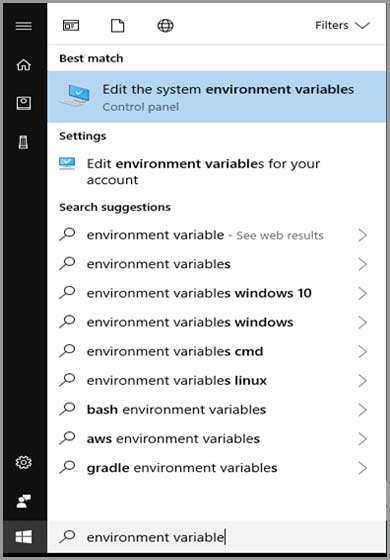
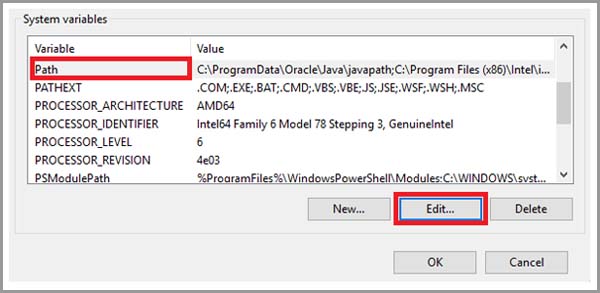
- Under User variables, select Path, click Edit, and add the folder where 7-Zip is installed, for example C:\Program Files\7-Zip.
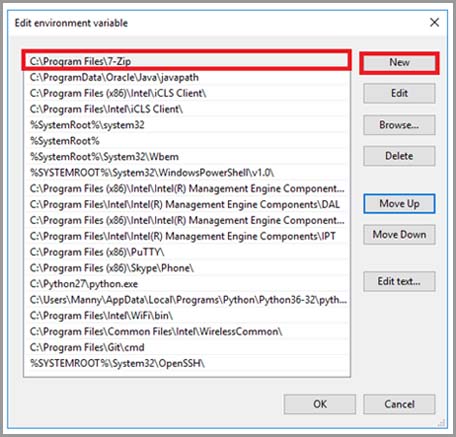
- In the Edit environment variable window, click New, enter the 7-Zip folder path, and click OK in each window.
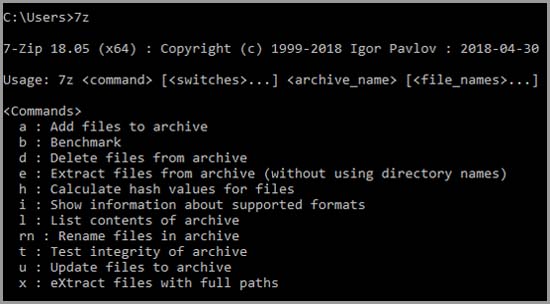
- Open a new Command Prompt and type 7z. If the Path was set correctly, 7-Zip shows its usage information.
Create the Compression Script
The job runs a batch script that uses 7-Zip to compress your source folder and encrypt it with a password.
- Create a file named backup-script.bat and add these lines:
@echo off
cd /d "<path_to_folder>"
7z a -r Backup -xr!_gsdata_ -p<password> -mhe=on
- Replace <path_to_folder> with the full path of the folder to compress. This should be the left (source) folder of your GoodSync job.
- Replace <password> with the password to use for encryption.
The script should look similar to this:
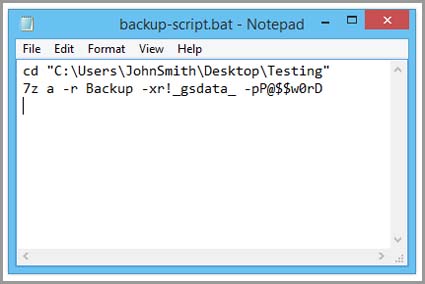
The script does the following:
- a -r Backup compresses all files and subfolders into an archive named Backup.7z.
- -xr!_gsdata_ excludes the hidden _gsdata_ folder that GoodSync uses.
- -p encrypts the archive with your password.
- -mhe=on also encrypts the file names inside the archive.
IMPORTANT: The password is stored as plain text in the .bat file. Keep the script in a secure location that only you can access, and keep a copy of the password. You cannot open the archive without it.
Create the GoodSync Backup Job
- Create a job to back up Backup.7z. If this is your first job, GoodSync prompts you to create one when it opens. Otherwise, click New Job in the upper-left corner. Enter a job name and select Backup as the job type.
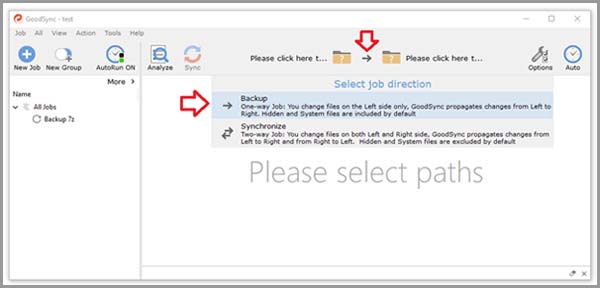
- Set the Left folder to the folder you want to compress and back up.
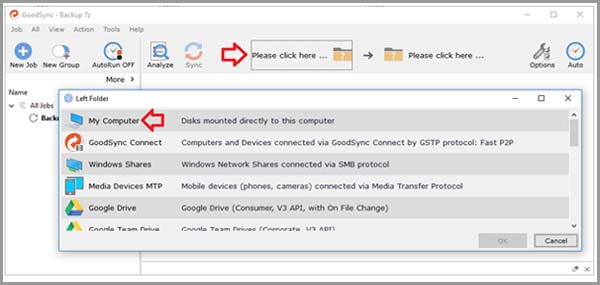
- Set the Right folder to any remote location. For details, see Setting up GoodSync Connect.
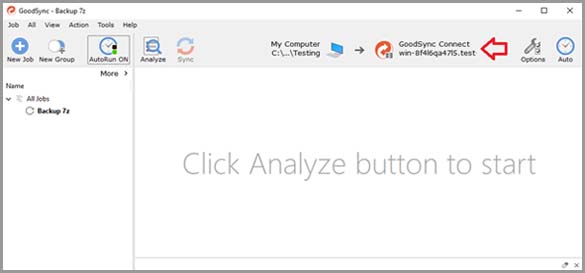
- Click the Job Options button in the upper-right corner.
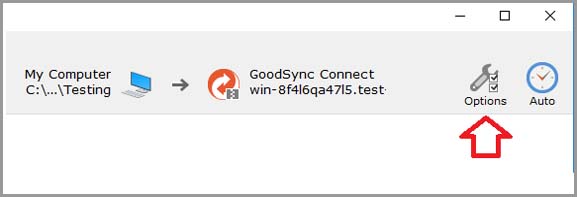
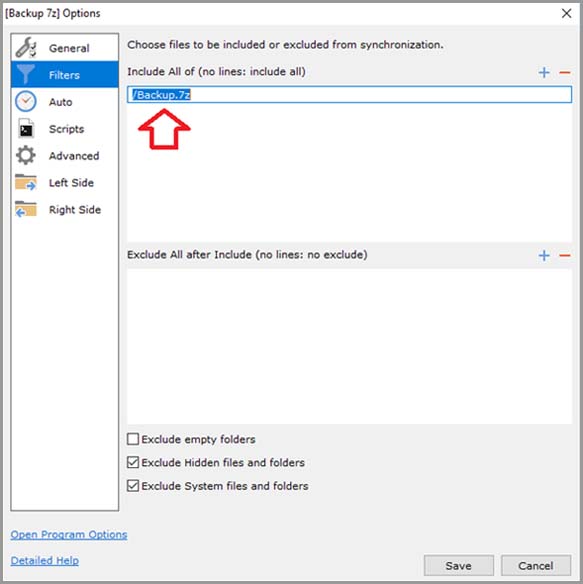
- On the Filters tab, add /Backup.7z to the Include list. This makes the job back up only the compressed file and nothing else.
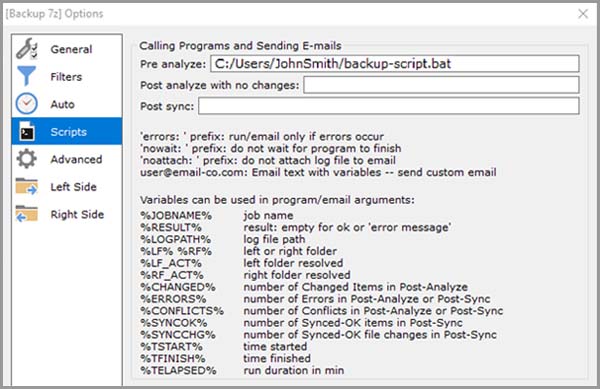
- On the Script/Email tab, set Pre-Analyze to the full path of backup-script.bat.
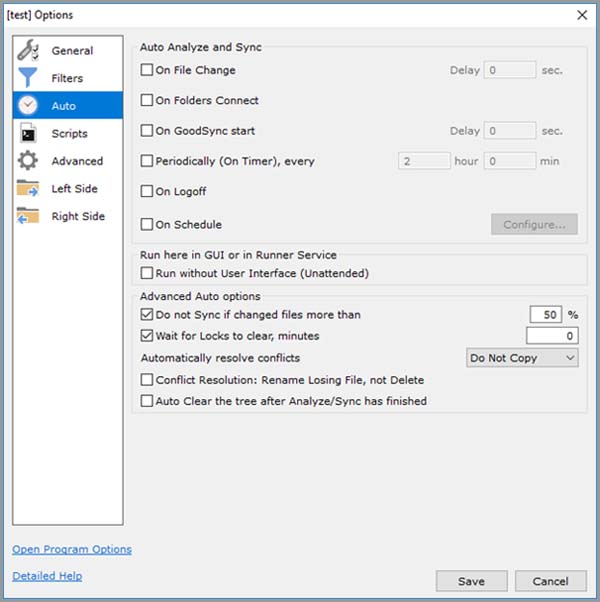
- To run the backup automatically, set a schedule on the Auto tab. For details, see Auto.
Your automated backup is now set up. Before each run, GoodSync runs the script to compress and encrypt your source folder, then backs up Backup.7z to your destination.