GoodSync Connect is the secure connection technology built into GoodSync. It uses the GoodSync Transfer Protocol (GSTP) to connect computers, servers, NAS devices, and other supported devices so GoodSync can back up, synchronize, or access files between them. The devices can be on the same local network or in different locations.
Unlike a cloud-storage service, GoodSync Connect transfers files directly between devices and storage locations you control. GoodSync does not store the files transferred through GoodSync Connect.
IMPORTANT: Standard account-based GoodSync Connect uses GSTPS, the TLS-encrypted version of GSTP, to protect file data while it travels between the GoodSync client and server.
In This Article
- How GoodSync Connect Creates a Secure Connection
- Connection Examples and Ports
- Before You Begin
- Step 1: Enroll the Computers
- Step 2: Create a GoodSync Connect Job
- Verify the Connection
- Protocol, Connection, and Security Information
- Troubleshooting
How GoodSync Connect Creates a Secure Connection
GoodSync Connect uses a client-server connection between two GoodSync devices. The device where the Job runs requests access to a folder on the device serving the files.
- Client device: The computer where the GoodSync Job is created and run. The client starts the connection and controls Analyze and Sync.
- Server device: The computer, server, or NAS that makes its files available to the client. It must have Serve files to other devices enabled and must be powered on, awake, connected, and running GoodSync when the Job runs.
For a standard account-based connection, GoodSync completes the following process:
- Identifies the devices: Each device is enrolled in the same GoodSync Account with a unique Computer Name.
- Locates the server: The GoodSync Mediator uses the account and Computer Name to help the client find the server, even when the devices are on different networks.
- Attempts a direct connection: GoodSync first tries a direct peer-to-peer connection between the client and server.
- Uses a Forwarder when required: If NAT, a firewall, a router, or another network restriction blocks the direct connection, GoodSync automatically uses a Forwarder to relay the encrypted connection.
- Transfers the files: GoodSync runs the backup, sync, or file-access operation over the established GSTPS connection.
NOTE: The Mediator does not receive or store transferred files. It only helps the devices find each other and coordinates the connection. A Forwarder relays encrypted traffic but does not store files. Your files remain only in the source and destination locations selected in the Job.
Connection Examples and Ports
The following diagram shows three common GoodSync Connect setups and the ports each one uses.
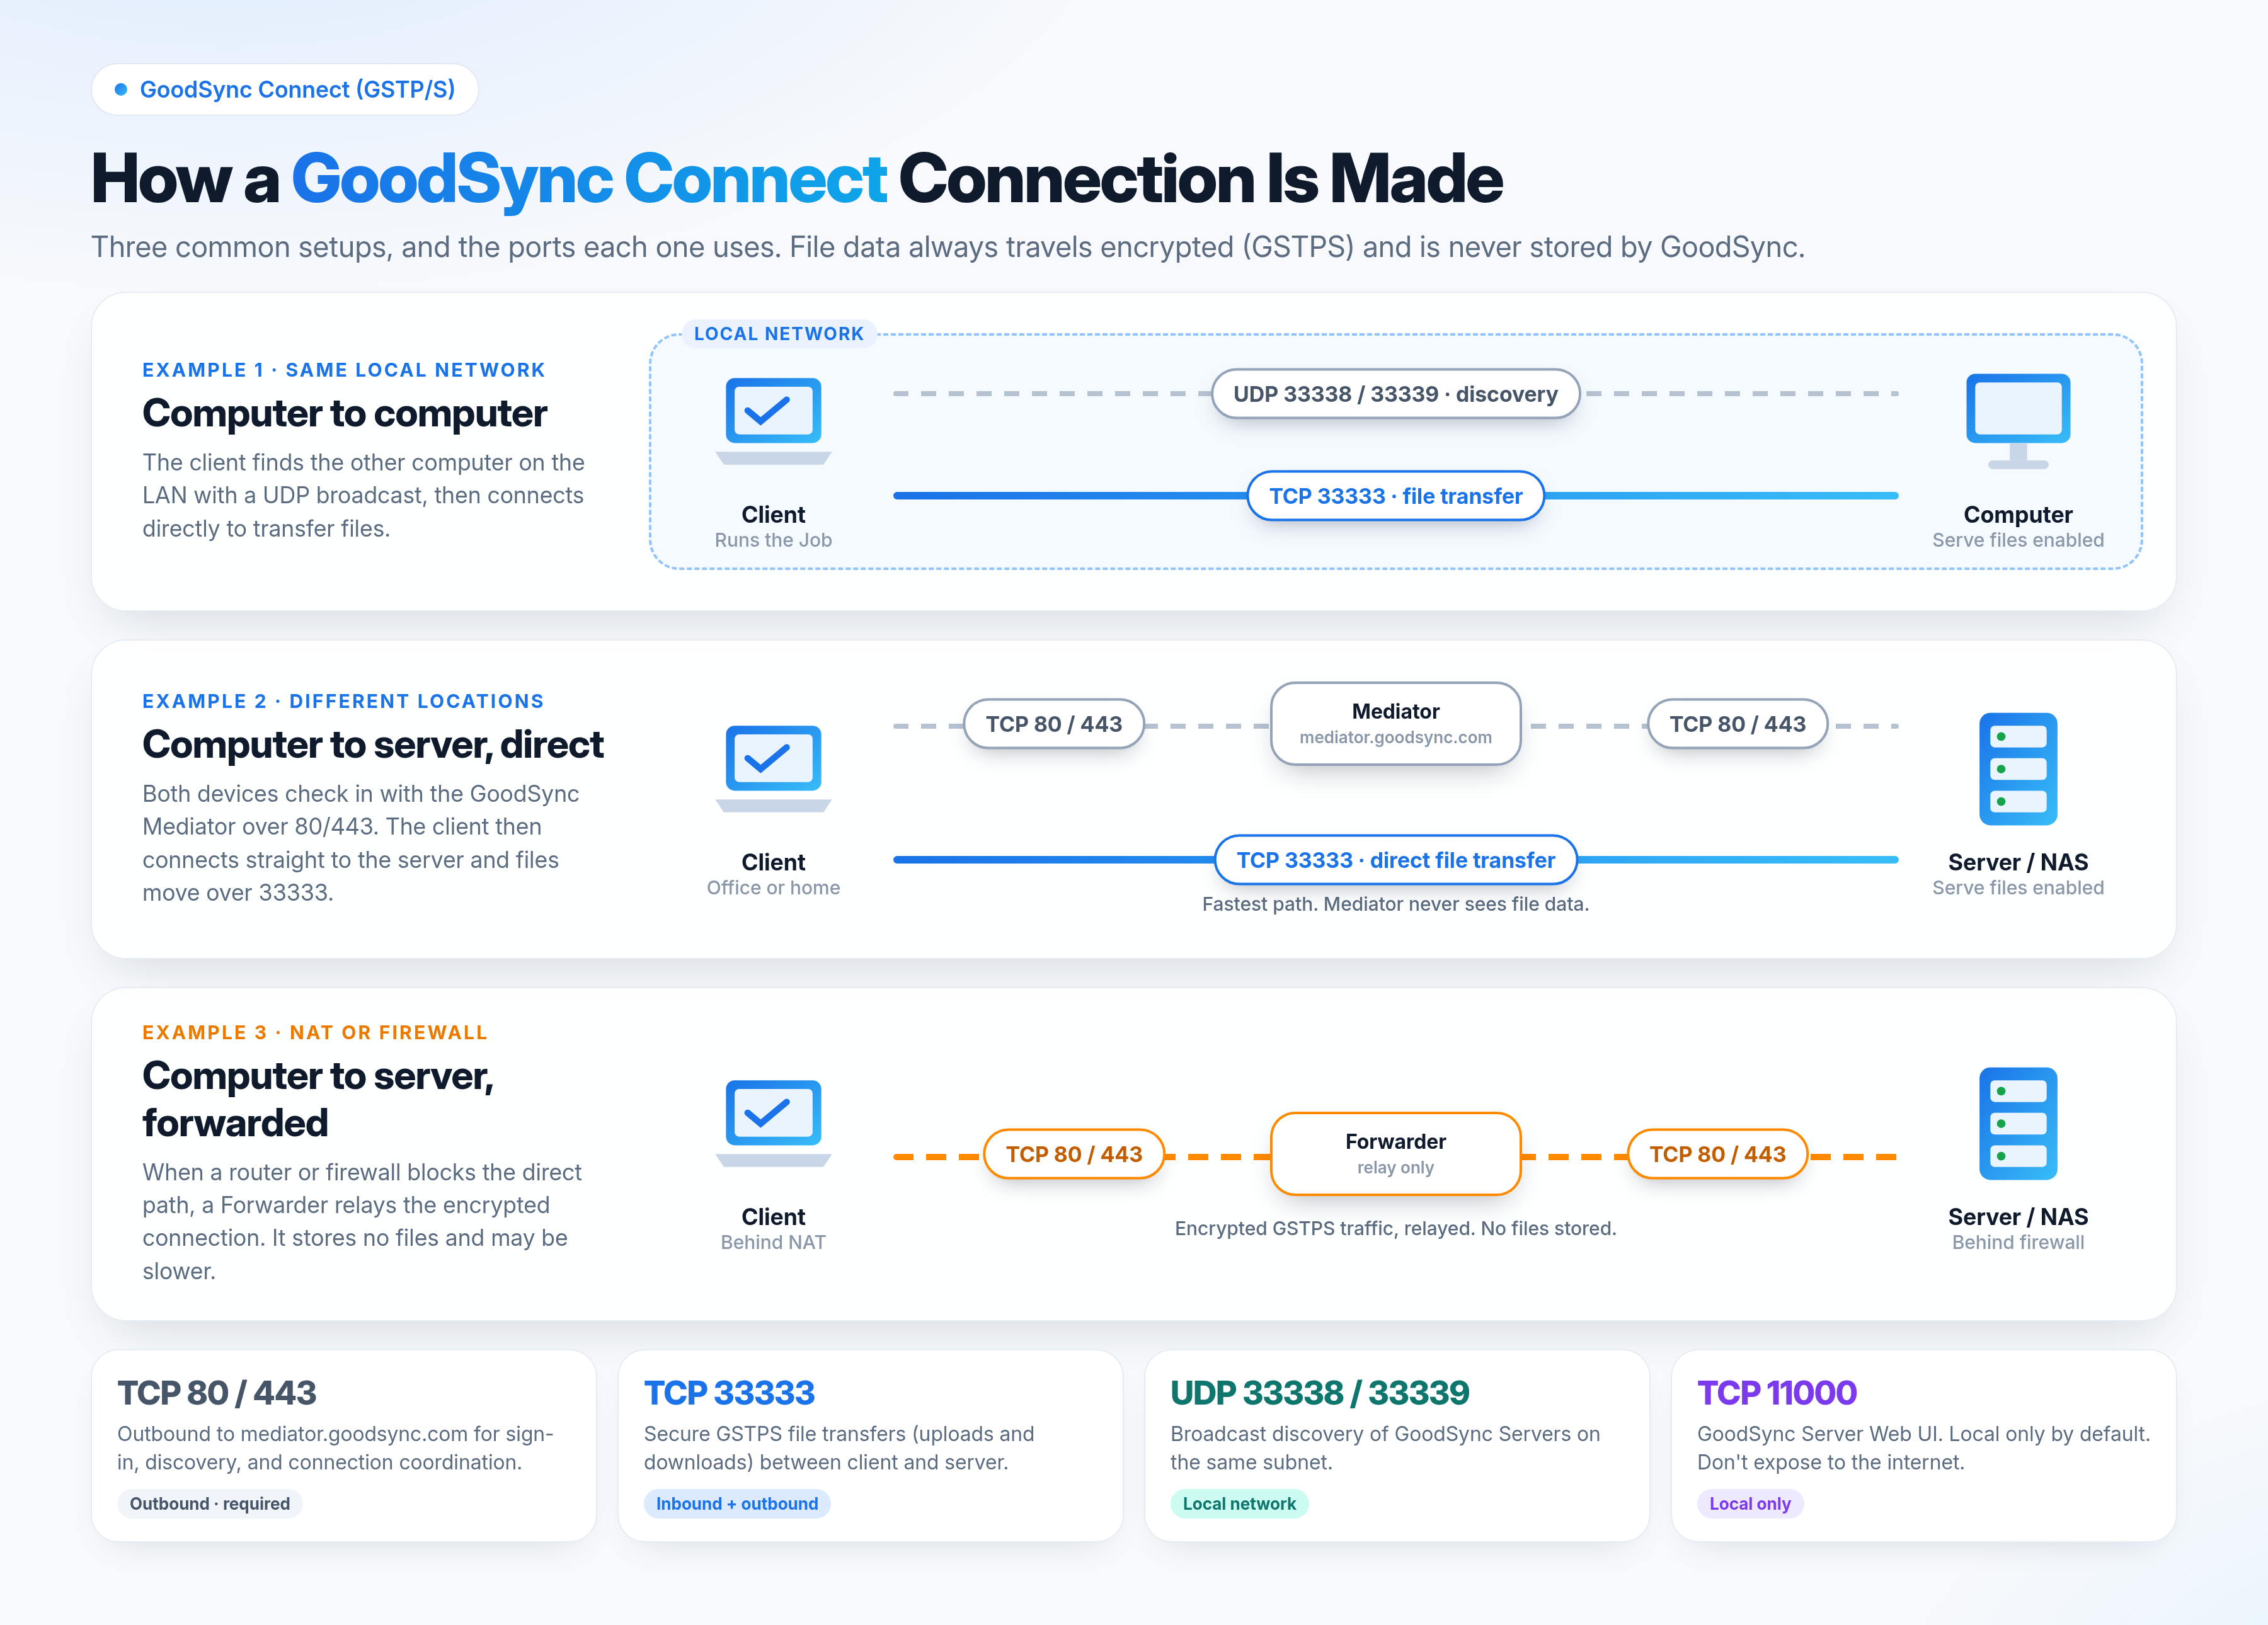
- Computer to computer (same local network): The client discovers the other computer over UDP 33338/33339, then transfers files directly over TCP 33333.
- Computer to server (direct): Both devices contact the Mediator over TCP 80/443. The client then connects directly to the server and transfers files over TCP 33333.
- Computer to server (forwarded): When the direct path is blocked, a Forwarder relays the encrypted connection. This path may be slower.
Before You Begin
- Install the latest GoodSync version on every participating device. Download it from the GoodSync Download page, or select Help > Check for Updates in GoodSync.
- Create a GoodSync Account if you do not already have one.
- Enroll the client and server devices in the same GoodSync Account.
- Confirm that the server device and the account running GoodSync have permission to access every local folder, network share, or protected location the Job uses.
- Keep the server device powered on, awake, connected, and running GoodSync whenever the client needs to connect.
- Allow the required ports through any firewall or security software.
Step 1: Enroll the Computers in Your GoodSync Account
Complete these steps on each computer that will take part in the GoodSync Connect Job.
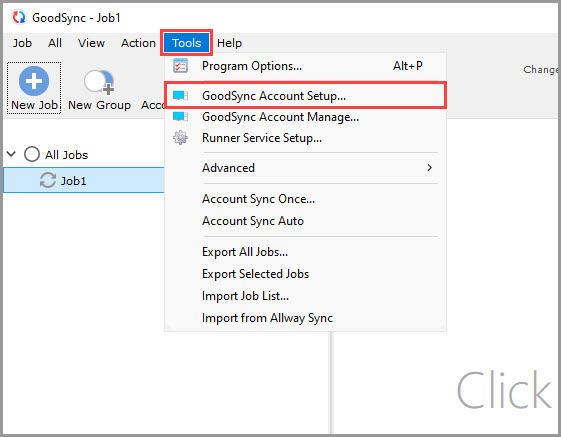
1) Open GoodSync and go to GoodSync Account Setup:
- Windows: Tools > GoodSync Account Setup
- macOS: GoodSync > GoodSync Account Setup
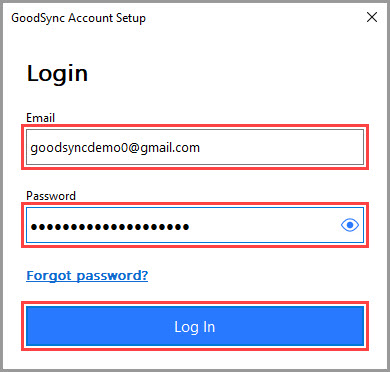
2) Enter your GoodSync Account Email and Password, then click Log In. If the account was used on this computer before, the fields may already be filled in.
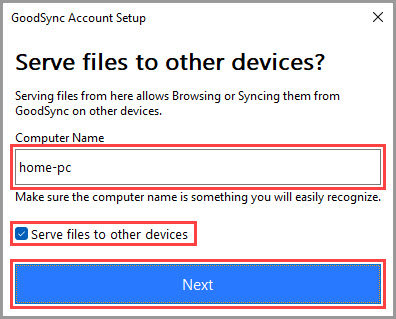
3) Enter a unique, recognizable Computer Name. This name identifies the device when other GoodSync installations browse your account's devices.
Turn on Serve files to other devices on every device whose files must be reachable through GoodSync Connect:
- Unchecked (client only): The device can run Jobs and start outgoing connections but cannot accept incoming GoodSync Connect requests.
- Checked (server enabled): Other authorized GoodSync devices can connect to this device and access the files it serves.
Click Next.
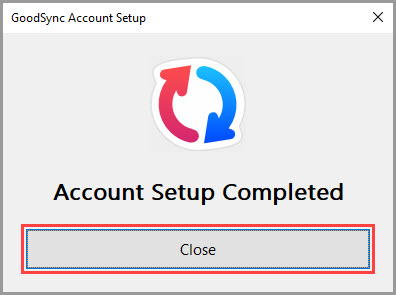
4) When Account Setup Completed appears, click Close.
Step 2: Create a GoodSync Connect Job
1) On the client computer that will run the Job, open GoodSync and click New Job in the toolbar, or select Job > New.
NOTE: To update an existing Job, select it and skip to step 3.
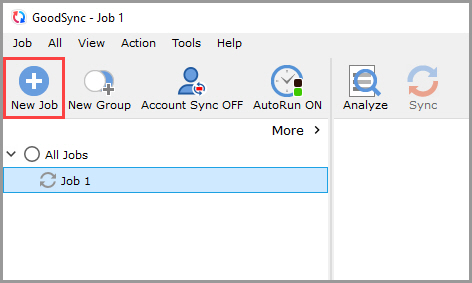
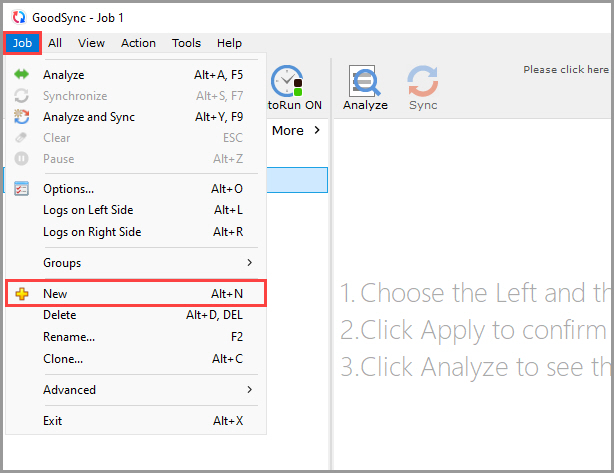
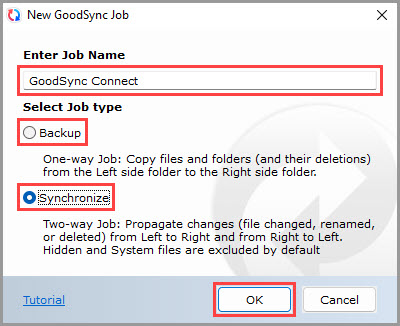
2) Enter a descriptive Job name, select Backup or Synchronize, and click OK.
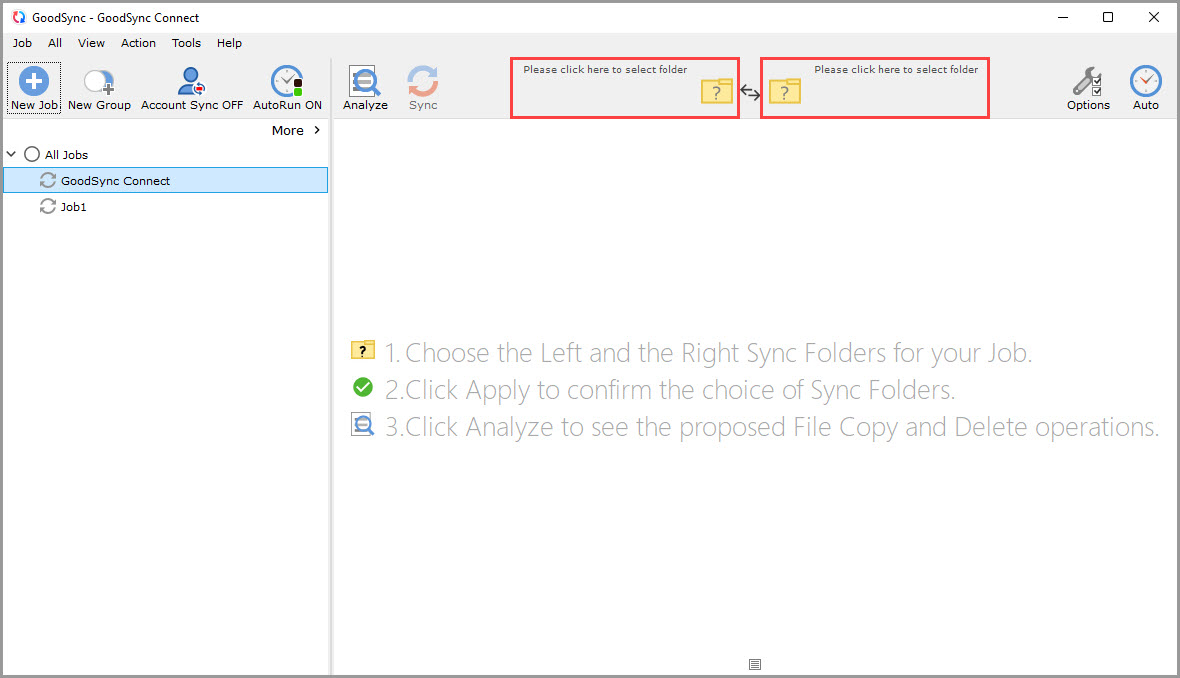
3) Click the left or right folder control for the side of the Job that will connect to the remote server.
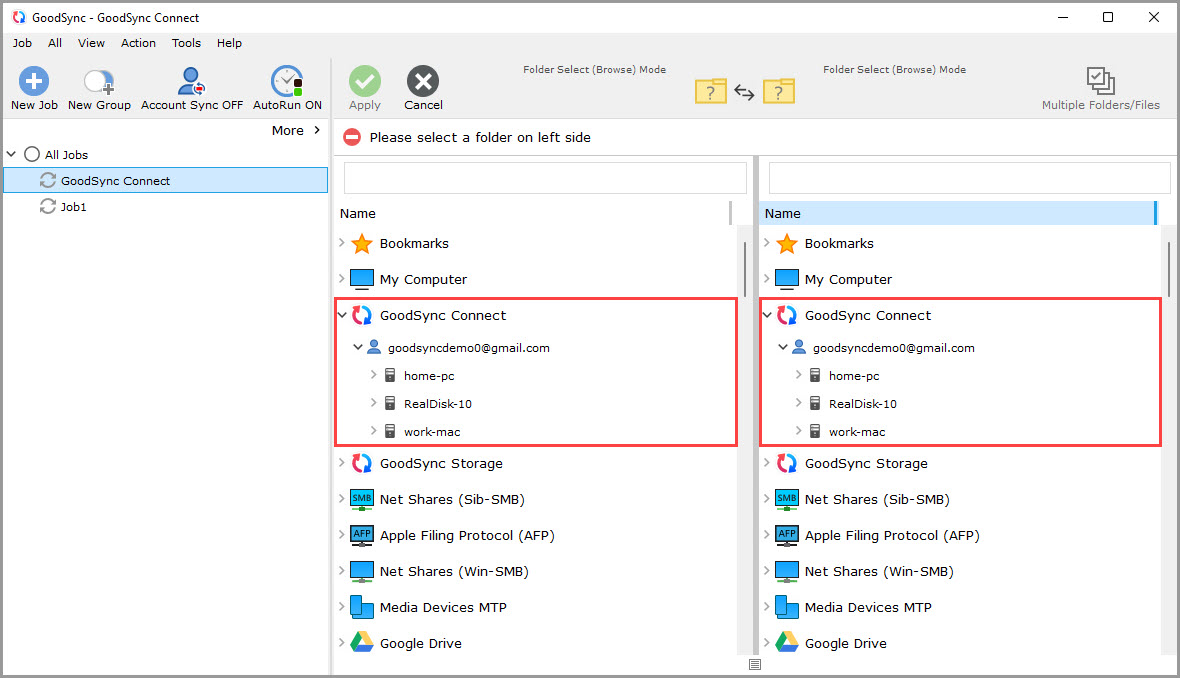
4) In the Browse dialog, scroll down and select GoodSync Connect, then select your GoodSync Account (shown by its email address). GoodSync lists the enrolled devices that have Serve files to other devices enabled.
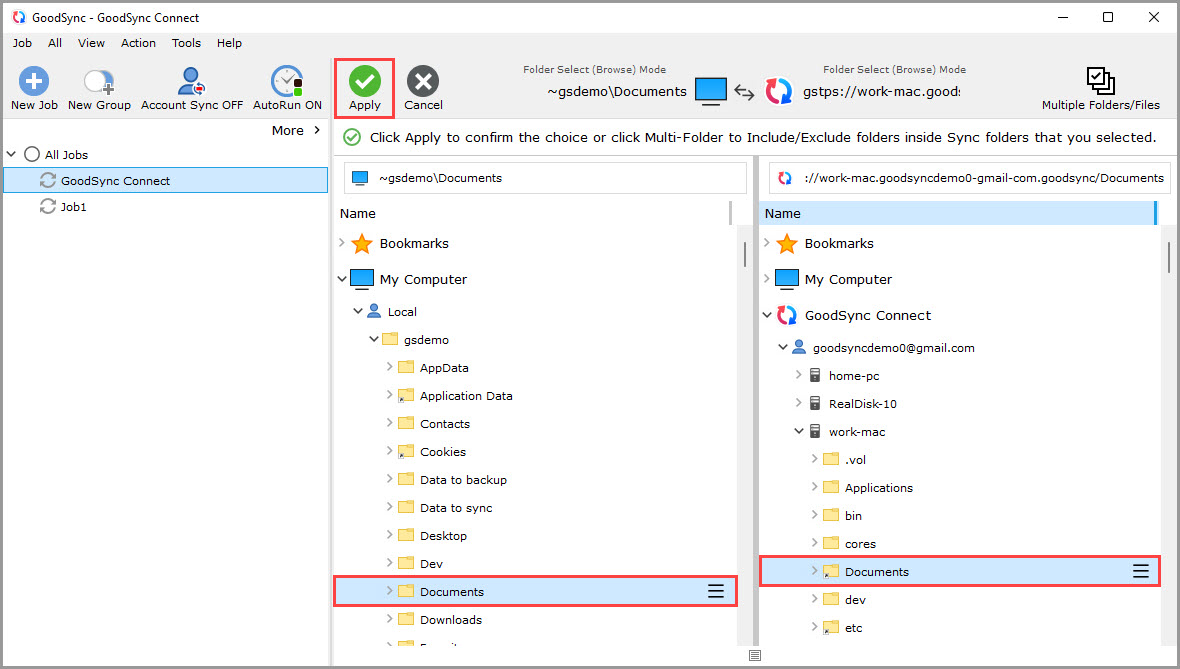
5) Select the remote server device and browse to the folder you need. Select the folder on the opposite side of the Job, then click the green Apply button.
GoodSync creates the GSTPS address for the selected device and folder automatically, so you usually do not need to type it.
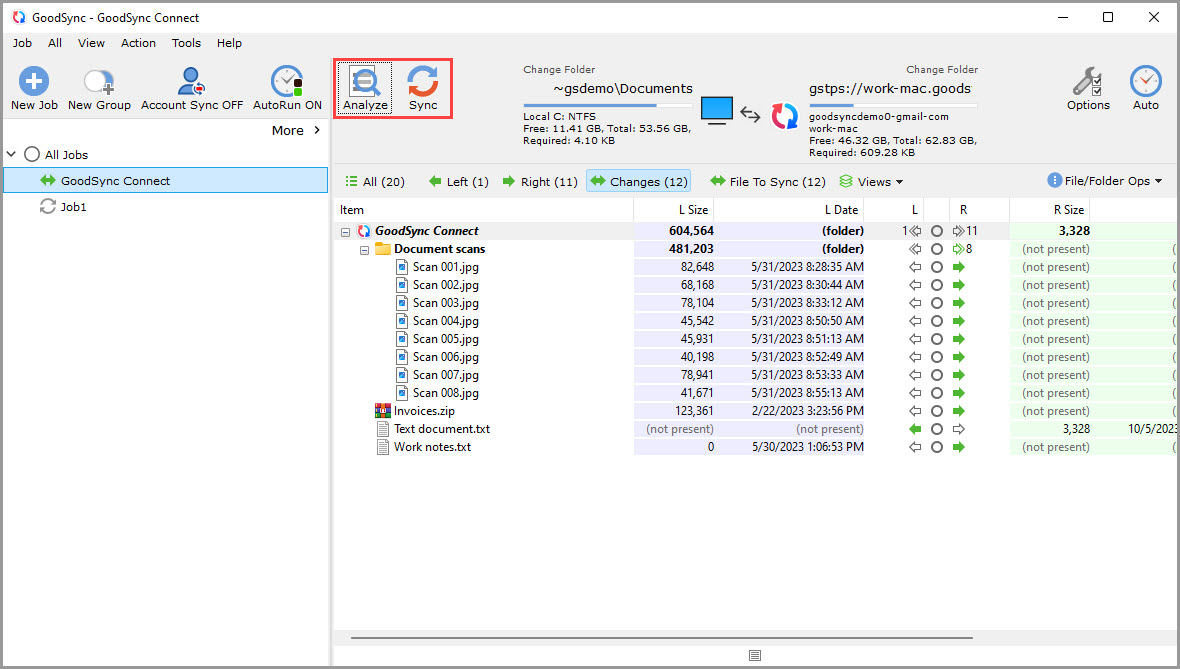
6) Click Analyze and review the proposed file actions. When they are correct, click Sync.
IMPORTANT: Review the Analyze results carefully before the first Sync, especially for a two-way Synchronize Job or a destination that already contains files.
Verify the GoodSync Connect Connection
Use GoodSync Explorer on Windows or macOS to confirm that the client can reach the remote device:
- Open GoodSync Explorer.
- Select GoodSync Connect.
- Select your GoodSync Account (shown by its email address).
- Select the remote server device.
- Browse to the folder you need.
If the remote device and its folders open, the devices are enrolled correctly and the connection is working.
Protocol, Connection, and Security Information
GSTP and GSTPS
GSTP (GoodSync Transfer Protocol) is GoodSync's proprietary protocol for communication and file transfer between a GoodSync client and server.
GSTPS is GSTP protected by TLS and uses the gstps:// prefix. Standard account-based addresses use GSTPS so the channel between client and server is encrypted. The unencrypted gstp:// protocol is not recommended.
A typical account-based GSTPS address looks like this:
gstps://ComputerID.UserID.goodsync/folder-path
You usually do not need to type this address. Selecting the remote device and folder in the Browse dialog creates it automatically.
Account-Based Addressing and Transfer Paths
After the Mediator locates the server, GoodSync uses one of two transfer paths:
- Direct peer-to-peer: The client connects straight to the server. This normally gives the best speed and latency.
- Forwarded: If the client cannot reach the server directly, GoodSync automatically selects a Forwarder that both devices can reach. The Forwarder relays the encrypted connection, stores no files, and may be slower.
NOTE: The Mediator handles device discovery and connection coordination only. It is not a transfer path and never receives file data.
Ports Used by GoodSync Connect
| Port | Direction | Purpose |
|---|---|---|
| TCP 80 and 443 | Outbound | Communication with mediator.goodsync.com for account authentication, device discovery, and connection coordination. Required. |
| TCP 33333 | Inbound and outbound | Secure GSTP/GSTPS file transfers (uploads and downloads) between GoodSync clients and servers. |
| UDP 33338 and 33339 | Local network | Broadcast discovery of GoodSync Servers on the same subnet. |
| TCP 11000 | Local only | GoodSync Server Web UI. Local-only by default; do not expose it to the internet. |
For the full list, including WebDAV and Manage API ports, see Ports Used.
NOTE: GoodSync tries to create the required Windows Firewall exceptions during installation. Third-party firewalls, endpoint-security software, proxies, VPNs, routers, or ISP restrictions may need extra configuration.
Troubleshooting GoodSync Connect
The Remote Device Is Not Listed
- Confirm that both devices are enrolled in the intended GoodSync Account.
- On the server device, confirm that Serve files to other devices is enabled.
- Confirm that the server device is powered on, awake, connected, and running GoodSync.
- Confirm that each enrolled device has a unique Computer Name.
- Install the latest GoodSync version on both devices, then check again.
The Device Is Listed but Cannot Be Opened
- Test the connection in GoodSync Explorer.
- Confirm that firewall, antivirus, endpoint-security, VPN, or proxy software is not blocking GoodSync or the required ports.
- Confirm that the server device and the account running GoodSync have permission to access the selected folder or network share.
- If the Job runs unattended, confirm that the GoodSync Runner service has the required operating-system credentials and folder permissions.
- Restart GoodSync or the GoodSync service on the server device, then test again.
The Connection Is Slower Than Expected
- Check the source device's upload speed and the destination device's download speed.
- Check for limits from Wi-Fi quality, disk performance, CPU usage, or other active transfers.
- A forwarded connection may be slower than a direct peer-to-peer connection.
- If a transfer is interrupted, restore connectivity and run the Job again. GoodSync Connect resumes an interrupted file transfer from where it stopped.