This guide explains how to migrate your existing company configuration to the latest GoodSync Control Center Account Sync model.
Account Sync connects the GoodSync Control Center directly to one or more GoodSync Accounts. This allows jobs, groups, server accounts, CC-Runners, and GoodSync GUI clients to use the same centrally managed configuration.
Complete the steps below in order. This migration provides the following benefits:
- Centralized management: Manage jobs and server accounts through the associated GoodSync Account for improved consistency and visibility.
- Automatic configuration sharing: Authorized CC-Runners and GoodSync GUI clients receive jobs and server accounts from the linked GoodSync Account.
- Flexible account access: Link or unlink GoodSync Accounts from the Control Center as needed to grant or revoke access to shared jobs.
Important: Complete the entire migration process to prevent job management issues or service interruptions.
Step 1: Associate a GoodSync Account with a Control Center Administrator
Each GoodSync Control Center administrator must have a unique GoodSync Account associated with their administrator profile.
You can either:
- Associate an existing GoodSync Account with the Control Center administrator account.
- Create a new GoodSync Account and associate it with the Control Center administrator account.
Once associated, the administrator's GoodSync Account becomes the central account used to manage and share jobs, groups, and server accounts with CC-Runners and GoodSync GUI clients.
- Log in to the GoodSync Control Center.
- Go to the Administrators tab and locate your administrator account.
- Click Associate.

Select the option to associate an existing GoodSync Account or create a new GoodSync Account.
Important: If your GoodSync Control Center company was created before December 2024, you most likely already have a GoodSync Account that contains your existing jobs. Associate that existing account instead of creating a new one. Using a different account may prevent your existing jobs from appearing during the migration.
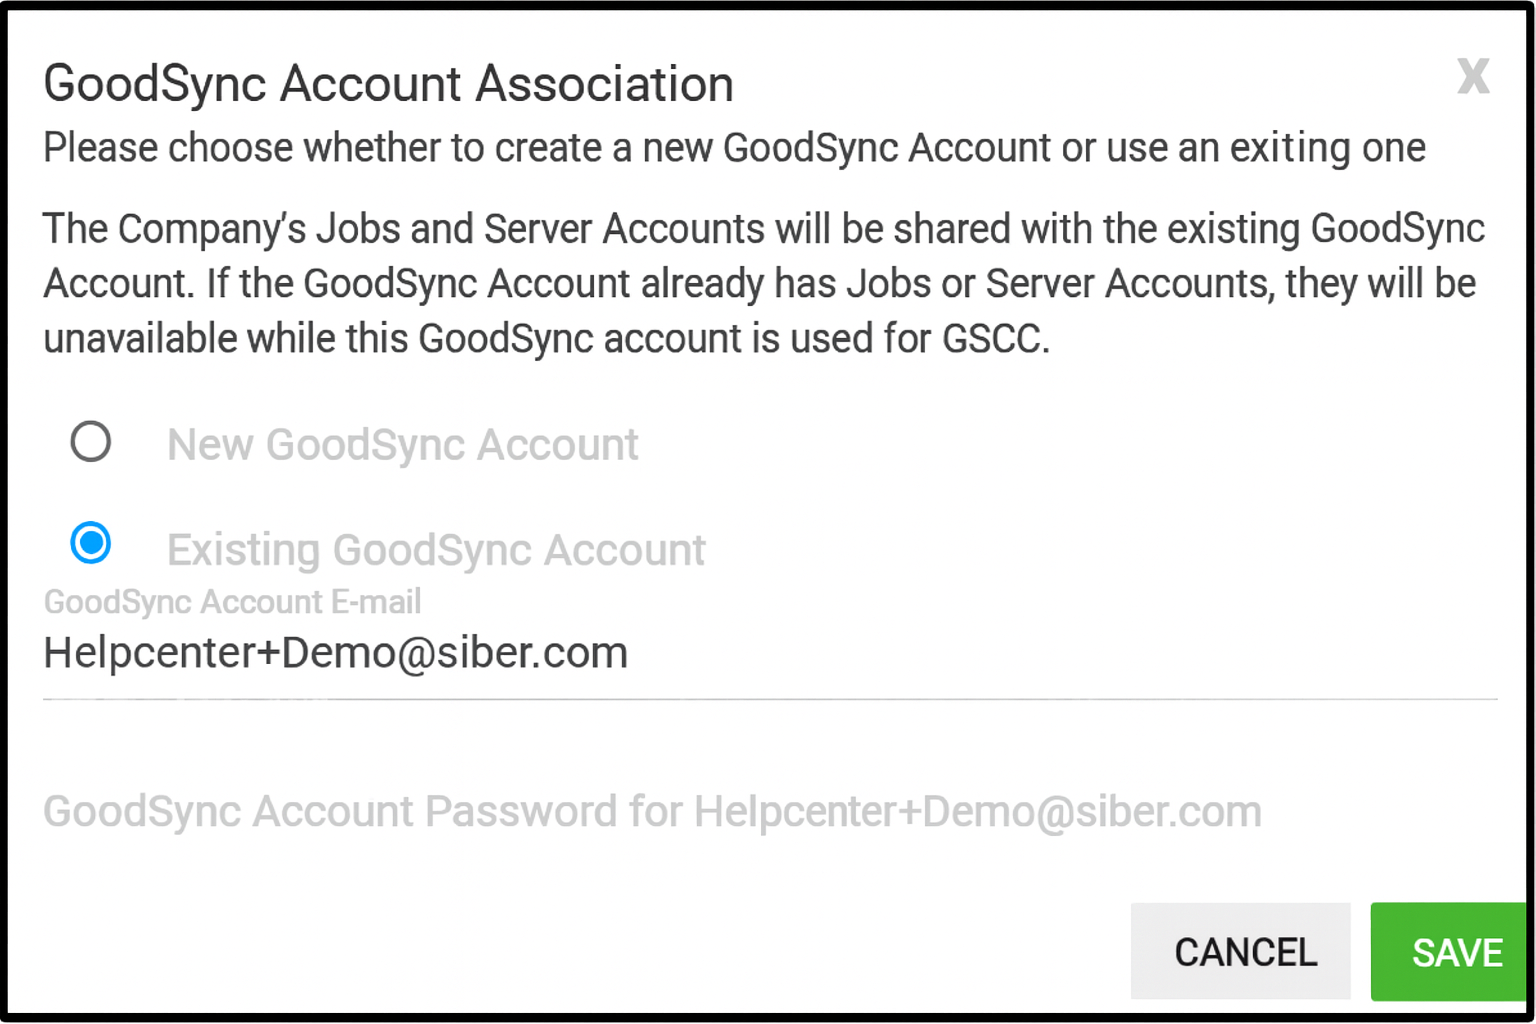
After the GoodSync Account is successfully associated, it appears in green below the administrator account.

Step 2: Update All Control Center Runners to the Latest Version
Update every existing Control Center Runner before continuing with the migration.
- Windows: Download the latest Windows Control Center Runner
- macOS: Download the latest macOS Control Center Runner
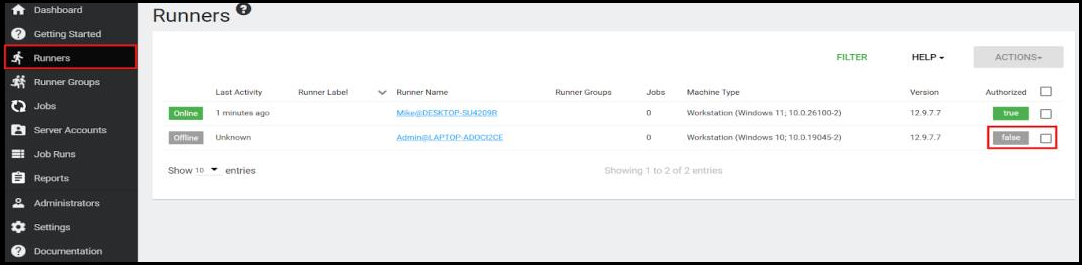
Important for new Runner installations: If you are installing a new Runner instead of updating an existing Runner, you must authorize it in the GoodSync Control Center.
Go to the Runners tab, select the checkbox next to the new Runner, then go to Actions > Authorize.
Step 3: Enable Account Sync on One GoodSync GUI Client
On one computer with a Control Center Runner installed, open the GoodSync GUI and log in using the GoodSync Account you associated in Step 1.
Recommended: Complete this step from a device assigned to one of your Control Center administrators. After the migration is complete, future jobs can be created and managed through the GoodSync GUI using Account Sync.
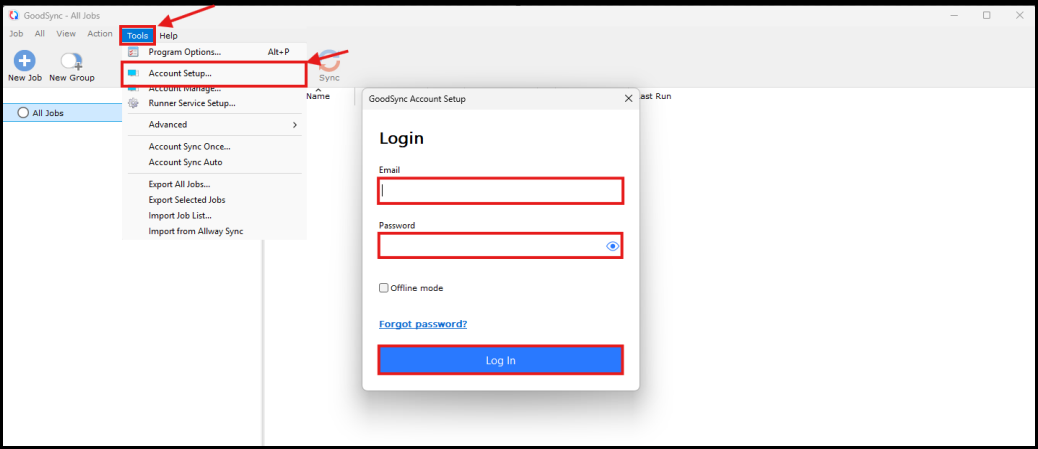
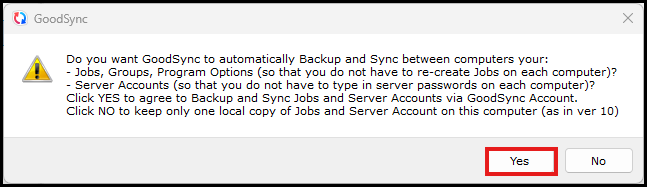
- Click the Account Sync Off icon, or go to Tools > Account Sync.
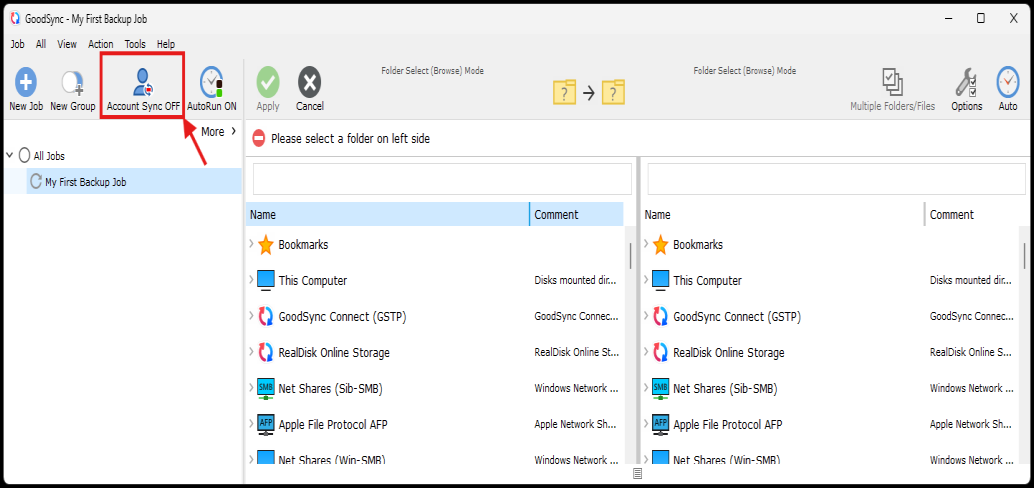
- Click Yes to enable Account Sync.
Step 4: Download Existing Jobs from the Control Center
Use the GoodSync GUI client from Step 3 to download the existing Control Center jobs and server account configuration.
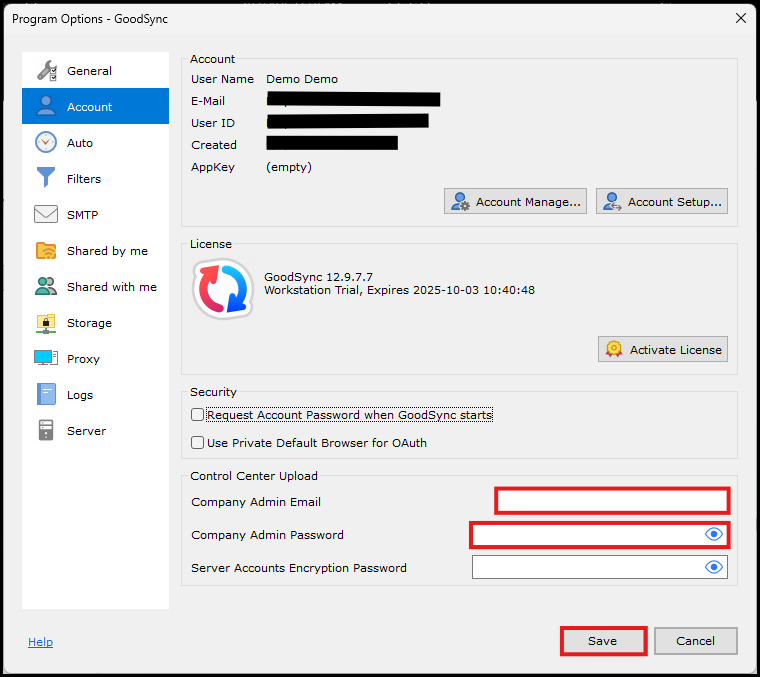
- Go to Tools > Program Options > Account > Control Center Upload.
- Enter the GoodSync Control Center administrator email address and password, then click Save.
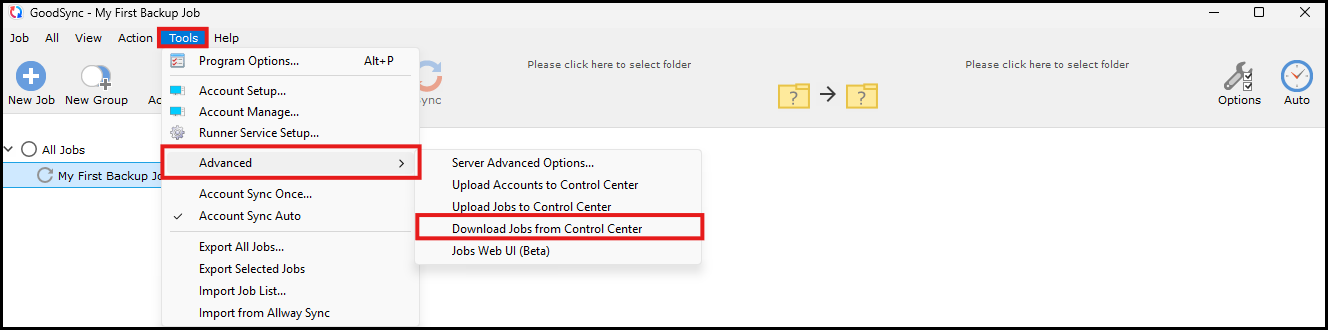
- Go to Tools > Advanced > Download Jobs from Control Center.
- Click Yes, then confirm the download when prompted.
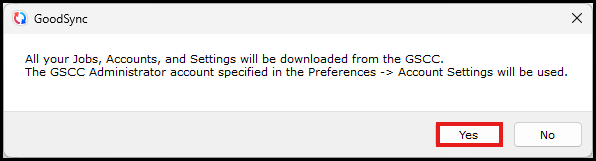
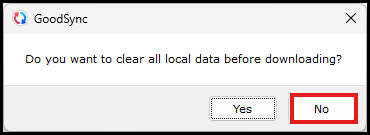
The GoodSync GUI will ask whether you want to clear the existing local jobs and configuration.
Recommended: Select No to keep the existing local jobs and settings. Select Yes only when you intentionally want to clear the current local configuration and start fresh.
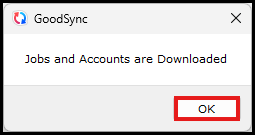
When the Jobs and Accounts are Downloaded message appears, click OK.
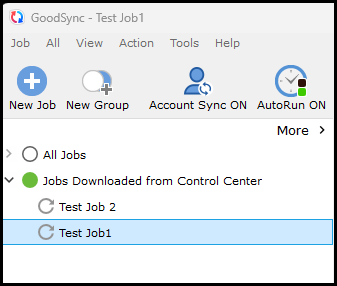
A group named Jobs Downloaded from Control Center now appears under All Jobs in the GoodSync GUI.
Recommended: Create a backup of the downloaded jobs before continuing. See How can I export/import my jobs?
Step 5: Enable the Account Sync Model for Your Company
Complete this step only after the existing jobs have been successfully downloaded in Step 4.
- Log in to the GoodSync Control Center using the administrator account used to complete the previous steps.
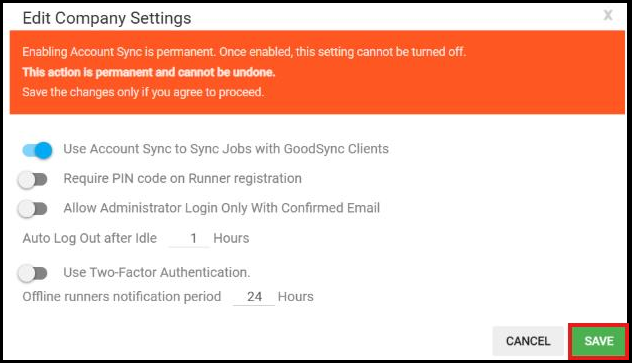
- Go to Settings > Edit Company Settings.
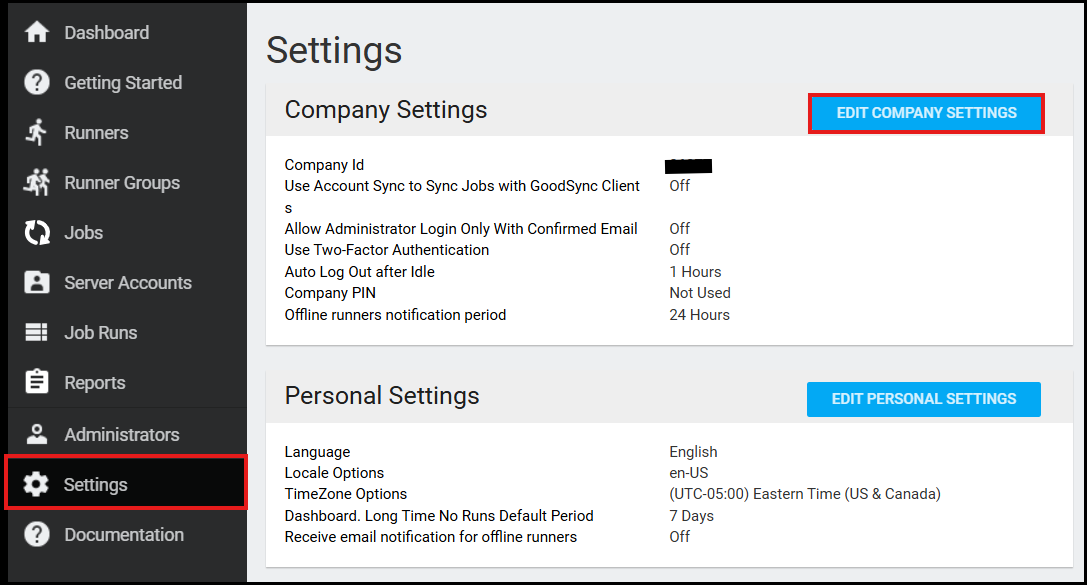
- Turn on the option Use Account Sync Jobs with GoodSync Clients, then click Save Changes.
- Enter the GoodSync Control Center administrator's password, then click OK to confirm the change.
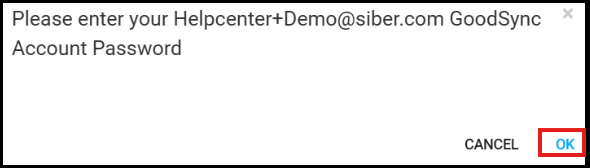
The Control Center will automatically sign you out. Sign back in using the same administrator email address and password.
Step 6: Sync the Downloaded Jobs with the GoodSync Account
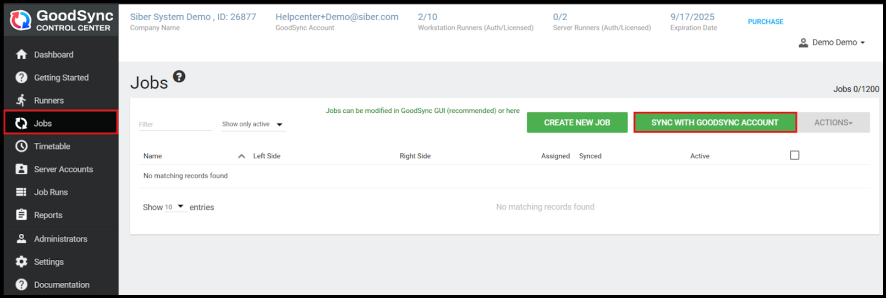
After signing back in, synchronize the downloaded jobs with the associated GoodSync Account.
- Go to Jobs > SYNC WITH GOODSYNC ACCOUNT.
- Review the confirmation dialog, then click Sync to apply the changes.
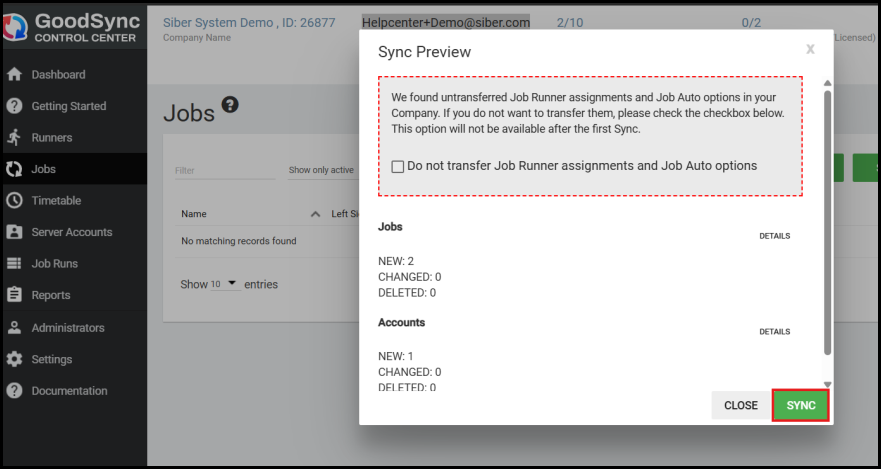
After synchronization is complete, your company will be using the latest GoodSync Control Center Account Sync model:
- Runners are managed from the Runners tab.
- Jobs are managed from the Jobs tab and in the GoodSync GUI using Account Sync.
- Auto Assignments are managed from the Timetable tab.
Migration complete: Review the Runners, Jobs, and Timetable tabs to confirm that all expected devices, jobs, and assignments are available.